
Building quality furniture doesn’t require endless weekends or a professional’s patience. The most efficient furniture projects combine smart design choices with streamlined techniques that let you complete meaningful pieces in half the time without sacrificing durability or appearance. The secret lies in working with simplified joinery methods, batching your processes, and choosing forgiving materials that look great with minimal finishing.
Time-constrained woodworkers often abandon projects mid-stream because they’ve chosen designs loaded with complicated joinery or finishes that demand perfect conditions. That frustration is avoidable. The difference between a project that drags on for months and one you finish in a few focused sessions comes down to deliberate planning, not cutting corners. When you select projects designed around efficiency from the start, you’re building momentum rather than fighting against complexity.
The furniture pieces that deliver the best return on your effort share common traits: they use techniques you can repeat across multiple components, they forgive small mistakes in ways that won’t show in the finished piece, and they require minimal specialty tools. A simple side table built with pocket screws and thoughtful proportions will serve you just as well as one with hand-cut dovetails, and you’ll actually finish it.
This guide walks you through the practical strategies that separate efficient builds from time traps. You’ll discover how to evaluate project designs before you cut a single board, which joinery methods offer the sweet spot between strength and speed, and how to organize your workflow so every shop session moves you meaningfully forward. Whether you’re fitting woodworking around a busy schedule or simply want to build more pieces this year, these approaches will reshape how you think about furniture projects.
What Makes a Furniture Project Efficient?
Efficient furniture making isn’t about racing to finish or taking shortcuts that compromise quality. It’s about working smarter by making intentional choices that reduce unnecessary complexity and wasted effort. When you understand what actually drives efficiency in a project, you can build beautiful, sturdy furniture in less time while enjoying the process more.
The foundation of any efficient project starts with design simplicity. This doesn’t mean boring or basic, it means thoughtful. A well-designed piece uses clean lines, straightforward construction, and eliminates decorative elements that don’t add structural value or visual impact proportional to the time they demand. Think of a classic Shaker table versus an ornately carved Victorian piece. Both can be beautiful, but one requires weeks of carving while the other can be completed in a weekend. Simplicity lets you focus your energy on perfect execution rather than complex details.
Strategic joinery selection makes an enormous difference in project timelines. A mortise-and-tenon joint is incredibly strong, but cutting precise mortises by hand takes practice and time. Pocket screws, biscuits, or even well-placed dowels can provide adequate strength for many projects in a fraction of the time. The key is matching the joinery method to the piece’s function and your skill level. A dining table that seats eight needs robust joinery; a simple bookshelf for your office can use faster techniques without sacrificing longevity.
Material selection and preparation often separate efficient builders from frustrated ones. Buying pre-surfaced lumber eliminates hours at the jointer and planer. Choosing plywood for large panels instead of edge-gluing solid boards saves significant prep time. Having all your materials cut, labeled, and organized before you start assembly means you’re not hunting for pieces or making measurement decisions mid-build when mistakes happen.
Finally, realistic time planning means understanding your own working pace and building in buffer time. Rushing creates mistakes that cost more time to fix than they saved. Efficiency means steady, confident progress where each step sets up the next one smoothly.
Essential Tools and Materials for Efficient Building
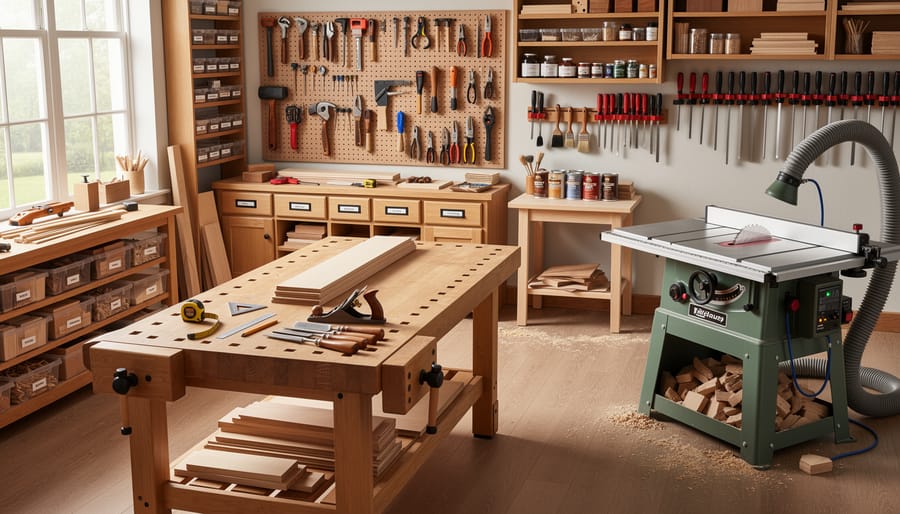
Tool Selection for Speed and Accuracy
Start with a quality combination square and a reliable tape measure, these two tools prevent more mistakes than any power tool can fix. For cutting, a circular saw with a straightedge guide delivers accurate crosscuts and rips without the cost or space requirements of a table saw. Pair it with a corded drill (more reliable than battery mid-project) and you’ve covered most fundamental operations.
A random orbital sander transforms finishing from a multi-day ordeal into a few focused hours. The time saved on surface prep alone justifies the investment within your first project. For joinery, pocket hole jigs offer strong joints with minimal setup and a forgiving learning curve, perfect when you’re building momentum.
Hand tools still matter for efficiency. A sharp block plane corrects minor errors in seconds that would require complete reassembly to fix otherwise. Quality chisels handle fine-tuning that power tools overshoot.
Avoid the trap of collecting specialty tools before you’ve proven you need them. A well-chosen six-tool kit that you know intimately outperforms a garage full of equipment you’re still learning. Master what you have, then expand based on actual bottlenecks you encounter.
Material Prep That Saves Hours
The single biggest time-saver in furniture making isn’t a fancy tool, it’s starting with ready-to-use materials. Pre-milled lumber arrives flat, square, and dimensioned, eliminating hours at the jointer and planer. Yes, it costs more per board foot, but for most hobbyists, the premium pays for itself in saved shop time and reduced frustration.
Plywood deserves special mention for efficiency-focused projects. A single sheet gives you large, stable panels without glue-ups or extensive milling. Choose it for case backs, drawer bottoms, and even tabletops when edge-banded properly. The time you’d spend joining boards for a wide panel vanishes completely.
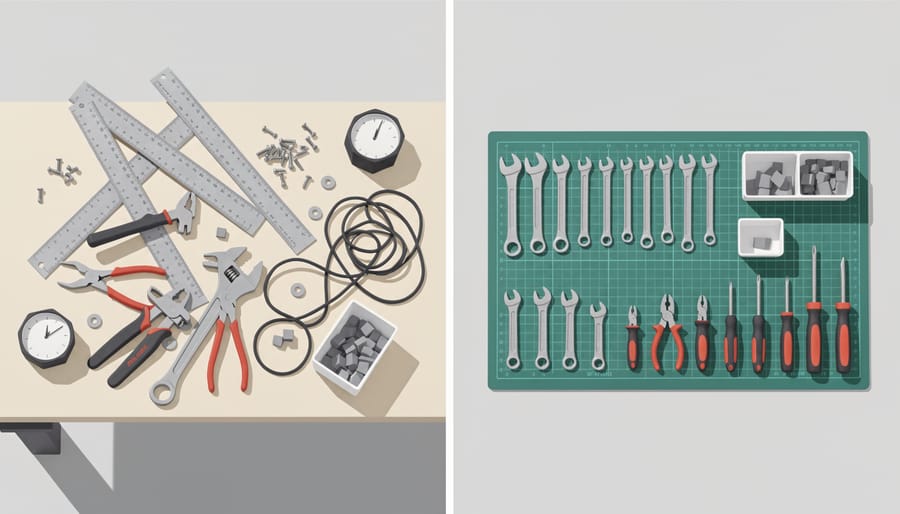
Organization before you cut makes an enormous difference. Lay out all your lumber and sort pieces by project component. Mark everything clearly with painter’s tape labels. Create a dedicated staging area where cut pieces wait for assembly, arranged in build order. This simple prep step prevents the mid-project scramble for that one piece you cut earlier, keeps your workflow moving forward, and catches measurement errors before they become expensive mistakes.
Safety Considerations for Faster Workflows
When you’re focused on completing a furniture project quickly, it’s tempting to skip the safety setup. But here’s the reality: a single accident can halt your project for days or end it permanently. Safe work is efficient work because it lets you maintain momentum without interruption, keeps your confidence high, and prevents the costly mistakes that happen when you’re anxious about a spinning blade or unstable workpiece.
Start every session with the basics: eye and face protection hearing protection for power tools, and dust management. Safety glasses take five seconds to put on but save you from a trip to the emergency room that loses you the entire weekend. A dust mask or respirator protects your lungs and keeps sawdust from making you miserable, which means you can work longer without breaks. These aren’t obstacles to speed, they’re what make sustained, productive work possible.
Your shop setup matters as much as protective gear. Clear walkways prevent tripping with armloads of lumber. Good lighting eliminates the squinting and hesitation that slow you down and increase error rates. Keep your work area organized so you’re not hunting for clamps or reaching over dangerous equipment. When everything has a place and your space feels controlled, you work faster because your brain isn’t managing a dozen micro-risks.
The efficiency mindset around safety is simple: treat it as part of the process, not a separate step. Experienced builders don’t debate whether to use a guard or find a push stick, they just do it automatically, the same way you’d pick up a pencil to mark a cut. That automaticity is what makes them both safe and fast.
Design Strategies for Time-Efficient Projects
Working with Standard Dimensions
Standard lumber comes in predictable sizes, 2x4s, 1x6s, sheets of plywood at 4×8 feet, and designing around these dimensions eliminates hours of ripping, resawing, and edge-jointing. When your table’s width matches a standard plywood dimension or your shelf depth uses lumber as-is, you skip the milling and move straight to assembly. The same applies to hardware: spacing shelf pins at standard intervals means no custom drilling jigs, and designing drawers around pre-made slides saves measuring and fitting time. This doesn’t limit creativity, it just shifts it toward proportion and joinery rather than custom dimensions. Beginners especially benefit because standard sizes reduce measurement errors and the need for specialized equipment. Your local lumberyard stocks these dimensions because they work, so let that inventory guide your design and watch your prep time shrink.
Choosing the Right Joinery Methods
Selecting joinery appropriate to your project’s demands prevents both over-engineering and frustration. Pocket hole joinery delivers strong connections in minutes, ideal for face frames, shelving, and anywhere the holes won’t show. You’ll spend more time measuring than actually joining. Dowels offer a clean look with moderate setup time; a simple jig makes alignment reliable, though drilling and glue-up add steps compared to pocket screws.
Mortise-and-tenon joints create heirloom-quality connections but demand precision layout, multiple tool setups, and careful fitting. Reserve these for visible structural elements where the investment pays off in both strength and aesthetics. Biscuit joints split the difference, faster than mortise-and-tenon, stronger than simple butt joints, perfect for edge-joining panels or cabinet carcasses.
For efficiency, match the joint to what’s visible and structural. Hidden connections supporting a shelf? Pocket screws get you building. The exposed corners of a dining table? That deserves the time investment of traditional joinery. Beginners often waste hours on joints nobody will see, save your energy for where craftsmanship shows.
Step-by-Step Process for an Efficient Build
Planning and Material Preparation
Before you make a single cut, spend fifteen minutes organizing everything you’ll need. This upfront investment pays back hours during the build.
Start with a detailed cut list that includes every piece’s dimensions and quantity. Write it down, don’t rely on memory. Group pieces by material type and thickness so you can visualize how they’ll come from your stock lumber. This prevents the frustrating discovery mid-project that you’re one board short.
Lay out all your materials in your workspace where you can see them. Check each board for defects, warping, or grain issues that might affect your project. Mark the best faces and arrange pieces in the order you’ll cut them, placing longer cuts first to maximize material use.
Set up your workspace with everything at arm’s reach: measuring tools, pencils, clamps, and safety gear. Clear away clutter from previous projects. A clean bench means fewer mistakes and less time searching for that tape measure you just had.
Batch Processing Similar Tasks
One of the most powerful efficiency gains comes from batching identical operations rather than bouncing between tasks. Instead of cutting one board, drilling its holes, sanding it, then moving to the next piece, complete all your cuts first, then all your drilling, then all your sanding.
This approach works because each tool switch costs time. Setting up a saw, adjusting the fence, testing the cut, these steps eat minutes. When you batch ten identical cuts, you do that setup once instead of ten times. Your brain stays in “cutting mode” too, which means fewer mistakes and faster work as you develop rhythm.
The same principle applies to drilling, chiseling, and finishing. Set up your drill press once for all the shelf pin holes. Apply finish to every component in a single session. This momentum isn’t about rushing, it’s about eliminating the friction between different types of work, letting you focus fully on each task.
Assembly Sequence That Minimizes Adjustments
Think of assembly as a series of moves where each step sets you up for the next. The secret isn’t working faster, it’s choosing an order that lets gravity, your bench, and simple clamps do the heavy lifting.
Start by joining the smallest subassemblies first. For a table, that means attaching legs to aprons before connecting the two end assemblies. This way, you’re working with manageable pieces that sit flat on your bench, not wrestling with an awkward full frame that needs three hands to hold square.
Always orient your work so clamps apply pressure perpendicular to your bench surface. This eliminates the need for cauls, supports, or assistance. If you find yourself thinking “I need another pair of hands,” you’ve probably skipped a better assembly sequence.
Dry-fit each stage completely before applying glue. Once you’ve confirmed everything aligns properly, the actual glue-up becomes straightforward rather than a panicked race against drying time. Your clamps should feel like they’re simply holding pieces in their natural position, not fighting misalignment.
Finishing Techniques for Speed and Quality
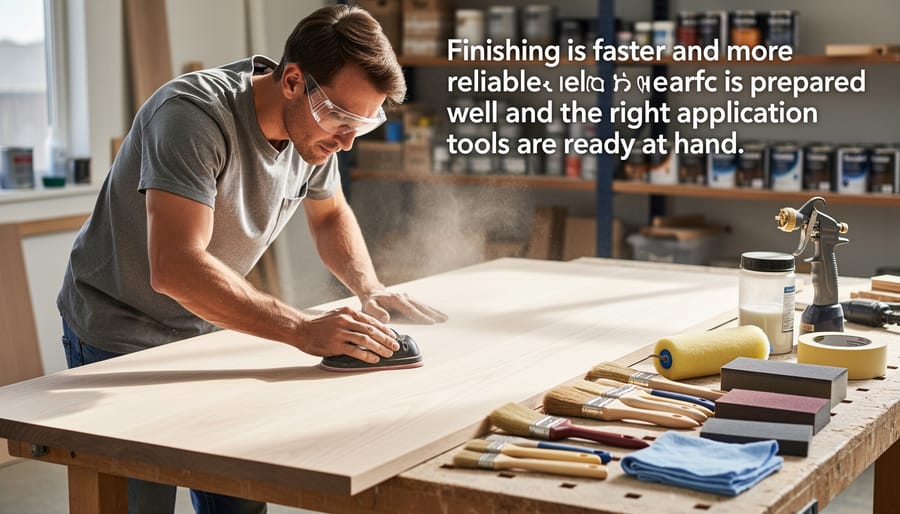
The finish you choose can add days to your project or wrap it up in hours. Water-based polyurethane dries in two hours between coats versus eight for oil-based, letting you apply three coats in a single day. For painted pieces, shellac-based primers seal and dry in 45 minutes, then topcoat with latex paint for a durable finish that’s ready to handle the next morning.
Wipe-on finishes like Danish oil or tung oil blends deliver professional results without brush marks. Apply thin coats with a lint-free cloth, let each dry 4-6 hours, and you’ll achieve depth with just two or three applications. The technique is forgiving and fast to learn.
Prep matters more than product. Sand to 180-grit, no higher, because finer grits close the wood pores and prevent absorption. Wipe down with a tack cloth, not your hand. Apply finish in the same direction as the grain using long, overlapping strokes. Light coats dry faster and level better than heavy applications that sag or pool.

Verifying Quality Without Sacrificing Speed
Quality checks don’t slow you down, they speed you up by catching mistakes when they’re still quick fixes instead of major rework. The key is knowing exactly when and what to verify, so you’re not obsessing over perfection at every step but also not discovering problems after the glue has dried.
Start with the “three critical moments” approach that experienced builders rely on: verify measurements before cutting, check fit during dry assembly, and inspect surfaces before finishing. These three checkpoints catch 95% of potential issues while adding maybe ten minutes to your total build time. Before you make any cut, take thirty seconds to confirm your measurement against both your cut list and the actual space the piece will occupy. It sounds basic, but this single habit eliminates the most common time-waster in furniture making, remaking parts because of measurement errors.
Dry-fitting deserves more time than most beginners give it. Assemble your entire piece without glue or fasteners, checking that joints close properly, panels sit flush, and everything squares up. This is where you discover that a rail is a quarter-inch too long or a shelf doesn’t quite fit, when fixing it means a minute at the saw instead of an hour of disassembly and repair. Use this time to plan your clamping strategy and identify any spots that’ll need extra attention during final assembly.
For quick visual inspections, develop the habit of sighting along edges and across surfaces from different angles. Your eye catches wind, twist, and misalignment faster than measuring tools, and a five-second glance down the length of a board tells you if it’s straight. Check for tearout, burn marks, or rough spots right after cutting or routing, that’s when cleaning them up takes seconds with sandpaper, not minutes of careful scraping later. These rapid visual sweeps become automatic with practice and catch the small flaws that affect the finished look.
Common Time-Wasters and How to Avoid Them
Most furniture projects take twice as long as they should, not because you’re slow, but because a handful of predictable problems eat up your time. Understanding these efficiency killers lets you prevent them before they derail your progress.
Poor planning creates a cascade of delays. When you start cutting without a complete materials list or a clear assembly sequence, you’ll make multiple trips to the lumber yard, discover you’re short on hardware halfway through, or realize pieces don’t fit together as you imagined. Spend thirty minutes before your first cut creating a detailed cut list, sketching the assembly order, and gathering every tool and supply you’ll need. This upfront investment saves hours of frustration.
Missing tools or hardware mid-project breaks your momentum completely. You’re in the zone, glue is setting, and you realize the drill bit you need is at the bottom of a toolbox. Before starting each work session, lay out every tool required for that specific phase. Keep a “project box” with all hardware, sandpaper grits, and small items you’ll need so nothing sends you hunting.
The most common time-wasters share a simple trait: they’re entirely preventable with minimal forethought. Here’s how to sidestep each one:
- Measure twice, cut once isn’t enough, mark your cutline clearly and verify measurements against your plan, not just the previous piece
- Use enough clamps and position them before applying glue; struggling with slipping joints while adhesive dries costs you quality and time
- Sand between finish coats only when fully dry; rushing this creates gummy messes that require complete stripping
- Keep your workspace organized during the build; hunting for a pencil or square fifteen times per session adds up fast
- Don’t skip dry-fitting assemblies; discovering alignment issues with wet glue means either living with mistakes or starting over
Inadequate clamping deserves special attention because it compounds other problems. When joints shift during glue-up, you’ll spend extra time filling gaps, sanding uneven surfaces, or even rebuilding sections. Invest in enough clamps to hold every joint solidly, and practice your clamping sequence during dry-fit so the actual glue-up goes smoothly.
Finishing mistakes waste the most time because they happen at the end when you’re eager to complete the project. Applying finish in dusty conditions, using incompatible products, or finishing unprepped surfaces means stripping everything and starting over. Work in a clean space, test your finish on scrap first, and complete all sanding before you open the first can.
Frequently Asked Questions
Building furniture efficiently raises practical questions, especially when you’re weighing speed against quality or wondering where to start. Here are answers to the most common concerns woodworkers have about working smarter in the shop.
Does building furniture faster mean sacrificing quality?
Not at all. Efficiency comes from smart planning, appropriate tool selection, and eliminating wasted motion, not from rushing through critical steps like joinery or finishing. Quality actually improves when you work systematically because you make fewer errors and maintain better focus throughout the project.
What’s a good starter project for practicing efficient techniques?
A simple side table or small bookshelf works perfectly because they involve fundamental skills without overwhelming complexity. These projects let you practice batch processing cuts, working with standard dimensions, and developing an efficient assembly sequence while still creating something genuinely useful.
How long should my first efficient furniture project take?
Complete beginners should budget 8-12 hours for a simple project like a side table, spread over several sessions. As you internalize efficient workflows and build muscle memory with your tools, that same project might take 4-6 hours. The improvement comes naturally with practice, not by rushing.
When should I invest in time-saving tools versus sticking with basics?
Start with quality basics like a good square, reliable measuring tools, and sharp blades, which improve every project immediately. Add specialized time-savers like a track saw or biscuit joiner only when you’ve identified a specific bottleneck in your workflow that occurs across multiple projects, not just one.
The learning curve for efficient furniture making is gentler than most people expect. You don’t need to master every technique at once. Pick one efficiency strategy from this guide, maybe batch processing your cuts or preparing a detailed cut list before starting, and focus on that for your next project. Each technique you internalize compounds with the others, gradually transforming how quickly and confidently you work. Remember that even experienced woodworkers continue discovering new ways to streamline their process, so approach this as an ongoing journey rather than a destination.
Efficiency in furniture making isn’t something you’re born with, it’s a skill you develop one project at a time. Every piece you build teaches you something new about workflow, timing, and which shortcuts actually work. You’ll discover your own rhythm, figure out which techniques feel natural, and gradually build a mental library of what works in your shop with your tools.
Start small. Pick one efficiency strategy from this guide and focus on it for your next project. Maybe it’s batch processing all your cuts, or spending an extra fifteen minutes on thorough material prep before you begin. Master that single technique until it becomes automatic, then layer in another. This incremental approach builds real confidence because you’re not trying to overhaul your entire process at once.
The best part? You don’t have to figure this out alone. Woodworking thrives on shared knowledge, and there’s something invaluable about learning these techniques hands-on with experienced builders who can show you the subtle details that make them work. At Vincent Furniture Making Classes, you’ll work alongside instructors and fellow woodworkers who understand the difference between rushing and working smart. You’ll see efficient techniques in action, ask questions in real time, and practice on actual projects until they feel second nature.
Your next piece of furniture will be more efficient than your last. Keep building, keep learning, and trust that every hour in the shop makes you a more capable woodworker.