
Working with 2×4 lumber opens up a world of affordable, achievable furniture projects that transform basic dimensional lumber into functional pieces for every room of your home. Whether you’re building your first outdoor bench or tackling a farmhouse dining table, 2x4s deliver professional results without demanding advanced woodworking skills or specialty materials. These projects typically cost between $20 and $150 in materials, and most can be completed in a weekend with just a circular saw, drill, and basic hand tools.
The beauty of 2×4 furniture lies in its simplicity. You’re working with lumber that’s already milled to consistent dimensions, which means less measuring, fewer complex cuts, and builds that actually square up properly. New builders appreciate how forgiving these projects are, while experienced makers value the speed and clean lines that come from working with uniform stock.
This collection walks you through 15 proven 2×4 furniture builds, from simple shelving units and nightstands to more ambitious projects like platform beds and kitchen islands. Each project includes the core construction approach, estimated material costs, and the skill level you’ll need. You’ll also find guidance on selecting the right grade of lumber, essential tools that make the work easier, and finishing techniques that protect your pieces and bring out the natural beauty of the wood.
The community around 2×4 furniture building continues to grow because these projects deliver real satisfaction. There’s something deeply rewarding about sitting on a bench or setting your coffee on a table you built with your own hands, especially when friends ask where you bought it.
Why 2x4s Are Perfect for Furniture Making
Working with 2×4 lumber offers a rare combination of accessibility and capability that makes it the ideal starting point for furniture builders. These humble boards, found in the racks of every hardware store and lumberyard, transform from construction staples into functional, attractive furniture with just a few basic tools and techniques.
The advantages of choosing 2x4s for your furniture projects extend across practical, financial, and educational dimensions:
- Budget-friendly pricing that won’t break the bank, typically just a few dollars per board
- Standard dimensions that simplify planning and eliminate guesswork in your builds
- Minimal tool requirements, most projects need only a saw, drill, and measuring tape
- Excellent training ground for core joinery techniques like butt joints, pocket holes, and lap joints
- Versatile enough for both indoor and outdoor furniture when properly finished
The real beauty of 2×4 construction lies in how forgiving it is for beginners. These boards are thick enough to hide minor mistakes, strong enough to create genuinely functional furniture, and straightforward enough that you’ll see progress quickly. You’ll develop the foundational skills every woodworker needs: accurate measuring, straight cutting, secure joining, and proper finishing. Each project builds confidence and competence.
Many woodworkers in our community started exactly where you are now, with a stack of 2x4s and a willingness to learn. That shared experience creates a supportive environment where questions are welcomed and progress is celebrated. You’re not just building furniture, you’re joining a tradition of makers who discovered their craft one board at a time.
How We Chose These 2×4 Furniture Ideas
We selected these fifteen projects with your success and growth in mind. Every build made our list because it checks several boxes: skill-level variety, practical function, aesthetic appeal, and genuine educational value. You’ll find straightforward beginner projects like the outdoor bench alongside more ambitious builds like the dining table, ensuring there’s something meaningful to tackle whether you’re picking up your first saw or looking to stretch your abilities.
We also prioritized balance between indoor and outdoor applications. Some of you need a sturdy coffee table for the living room, while others want planter boxes for the garden. This mix reflects real needs and gives you options that fit your space and lifestyle. Each project teaches specific skills, measuring and assembly fundamentals, joinery techniques, finishing methods, or working with angled cuts, so you’re building both furniture and capability.
Finally, we considered accessibility. Many of these projects have plans available through books offering step-by-step guidance, and none require specialty tools or exotic materials. Our goal is to meet you where you are, give you projects you can genuinely complete, and support your hands-on learning journey every step of the way.
1. Classic Outdoor Bench
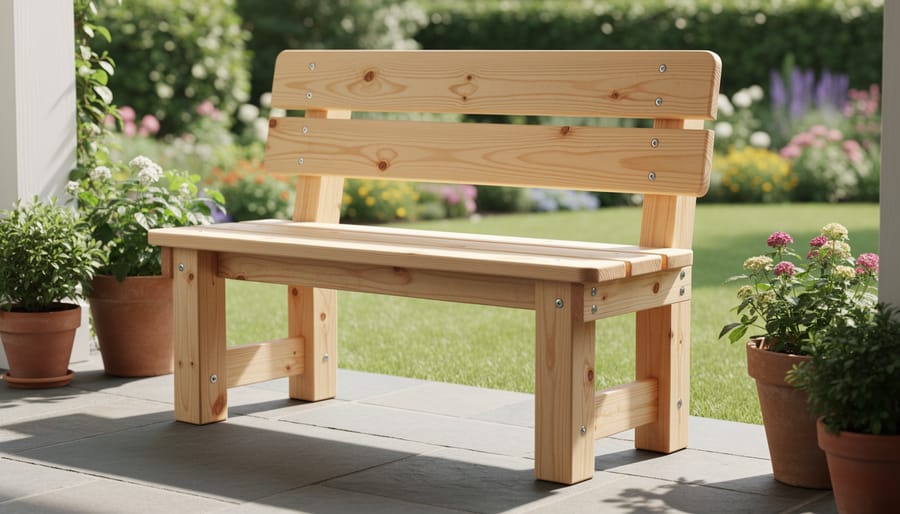
A classic outdoor bench is where many woodworkers take their first swing at furniture building, and for good reason, it requires just a handful of cuts, basic screws, and teaches you the fundamentals of measuring, squaring, and assembly without overwhelming complexity. You’ll build a simple frame from vertical legs and horizontal supports, then attach seat slats across the top, creating a sturdy piece that can handle years of porch sitting or garden rest stops. The beauty lies in how forgiving the design is: small measurement variations won’t ruin the project, and you’ll quickly learn how wood responds to your tools and techniques.
The straightforward construction means you’ll spend more time actually building than puzzling over plans, and finishing options range from weather-resistant stain for a natural look to bold outdoor paint that adds personality to your space. This bench teaches you to drill pilot holes to prevent splitting, countersink screws for a flush finish, and check for level and square, foundational skills that carry into every furniture project ahead.
2. Rustic Coffee Table
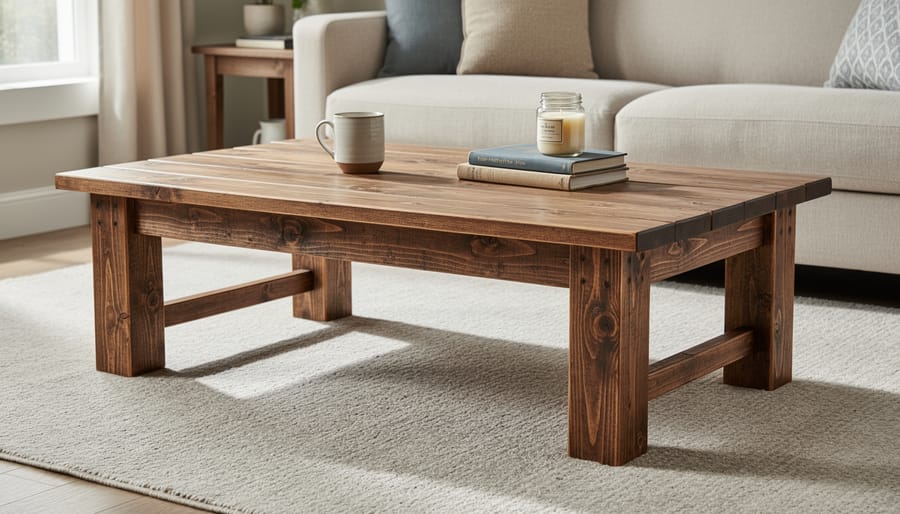
A rustic coffee table built from 2x4s brings farmhouse charm to any living room while teaching you essential finishing skills that elevate rough lumber into polished furniture. The construction couldn’t be simpler: four legs, a rectangular frame, and a series of 2x4s laid side-by-side across the top. Cut your legs to your preferred height (16-18 inches works well for standard seating), build a frame to support the tabletop, and attach everything with screws.
This project shines as an introduction to sanding and finishing techniques. You’ll learn how proper sanding, starting with coarse grit and progressing to fine, transforms rough lumber into smooth surfaces ready for your chosen finish. Experiment with different looks: a dark walnut stain creates classic farmhouse appeal, chalk paint delivers a cottage vibe, or clear polyurethane preserves the natural wood grain. The flat tabletop surface is forgiving for first-time finishers, letting you practice brush strokes and wipe-on applications without complex angles or hard-to-reach corners.
3. Wall-Mounted Shelving Unit
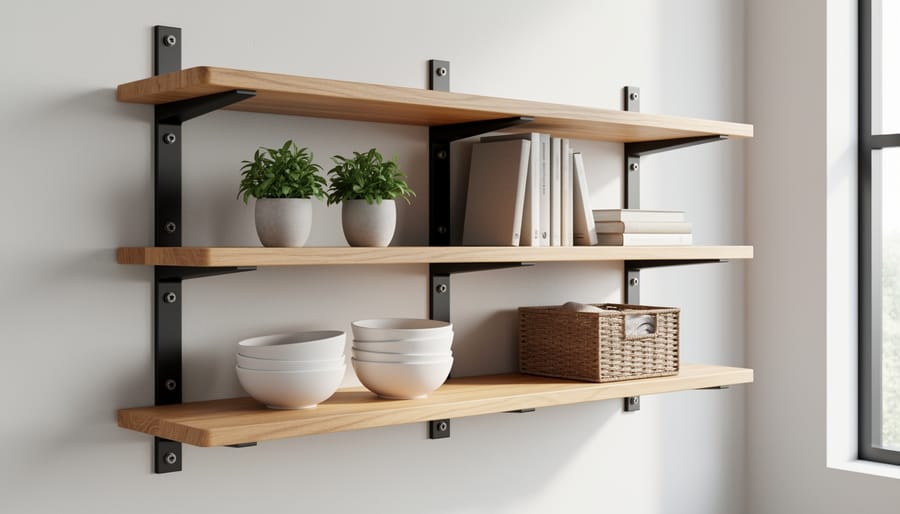
Wall-mounted shelving made from 2x4s transforms vertical space into functional storage without eating up floor area, ideal for small rooms, workshops, or anywhere you need extra organization. You’ll cut 2x4s to your desired shelf length, then decide whether to use metal L-brackets for a straightforward bracketed look or create a floating effect by mounting the boards directly to hidden supports. Layout planning matters here: sketch your wall space first, marking stud locations with a stud finder, since you’ll need to anchor into solid framing for any shelf that will hold real weight.
This project teaches crucial lessons about load distribution and proper anchoring. Lag bolts into studs handle heavier loads like books or tools, while drywall anchors work for lighter decorative items. Space your shelves based on what you’ll store, taller gaps for binders or boots, closer spacing for spice jars or small plants. Sand your 2x4s smooth and finish them to match your room’s style: dark stain for a rustic den, crisp white paint for a modern kitchen, or clear sealer to show the natural grain. The beauty is customization, add as many shelves as your wall allows, vary the lengths to create visual interest, or even stagger them at different heights for an asymmetrical gallery effect.
4. Dining Table with Farmhouse Legs
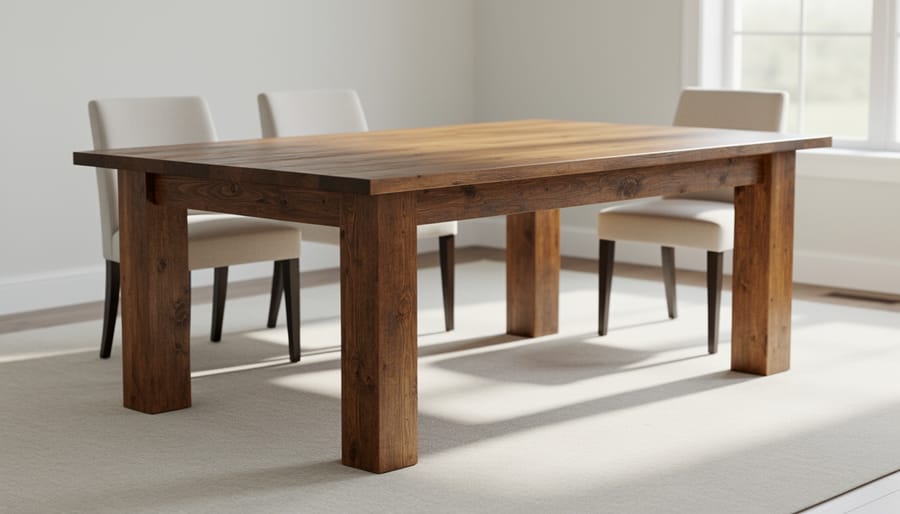
A dining table built from 2x4s becomes the centerpiece of your home, a place where meals, conversations, and memories unfold around something you created with your own hands. This project steps up in scale and ambition, but the chunky farmhouse legs and substantial tabletop make a statement that’s well worth the effort.
For the legs, you’ll typically build them by laminating multiple 2x4s together to create thick, sturdy posts that can handle the table’s weight and daily use. The tabletop itself consists of 2x4s laid edge-to-edge and secured from underneath, creating a solid surface that feels as durable as it looks.
Joinery choices shape both the build process and your skill development. Pocket hole screws offer a beginner-friendly approach that creates strong, hidden connections, perfect if you’re tackling your first large furniture piece. More experienced builders might explore mortise and tenon joints for the leg-to-apron connections, which add traditional craftsmanship and exceptional strength.
Stability matters with a piece this size. Properly sized aprons around the perimeter, cross-bracing underneath, and secure leg joints ensure your table won’t wobble or rack over years of use. Taking time to get these structural elements right means you’ll build something that serves your family for decades, not just seasons.
5. Outdoor Planter Box
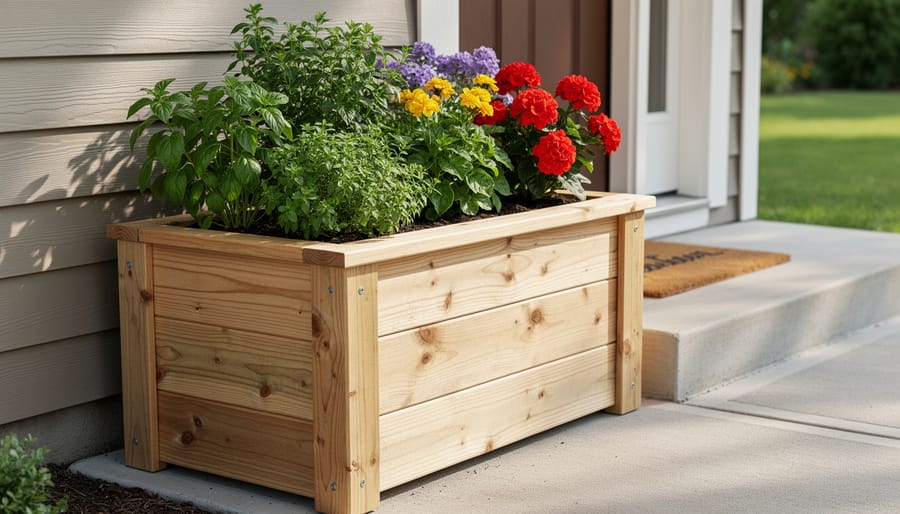
An outdoor planter box ranks among the most rewarding beginner projects, you’ll see your handiwork bloom every time you step outside. Start by cutting four pieces for the sides and a base with drainage gaps (leave quarter-inch spaces between bottom boards or drill holes). Most builders assemble the box using simple butt joints reinforced with exterior-grade screws, which teaches you how corners align and hold together under weight.
Weatherproofing separates a planter that lasts one season from one that endures for years. Apply a water-based exterior stain or sealer to all interior and exterior surfaces before assembly, paying extra attention to end grain where moisture sneaks in. Skip pressure-treated lumber if you’re growing edibles, untreated cedar or pine with a food-safe finish works better.
This project builds practical skills in corner joinery and introduces you to outdoor wood treatments without the pressure of complex angles or joinery. The finished box transforms empty patio corners into herb gardens or adds vertical interest beside entryways, proving that functional furniture can enhance outdoor living spaces on a weekend timeline.
6. Twin or Full Bed Frame
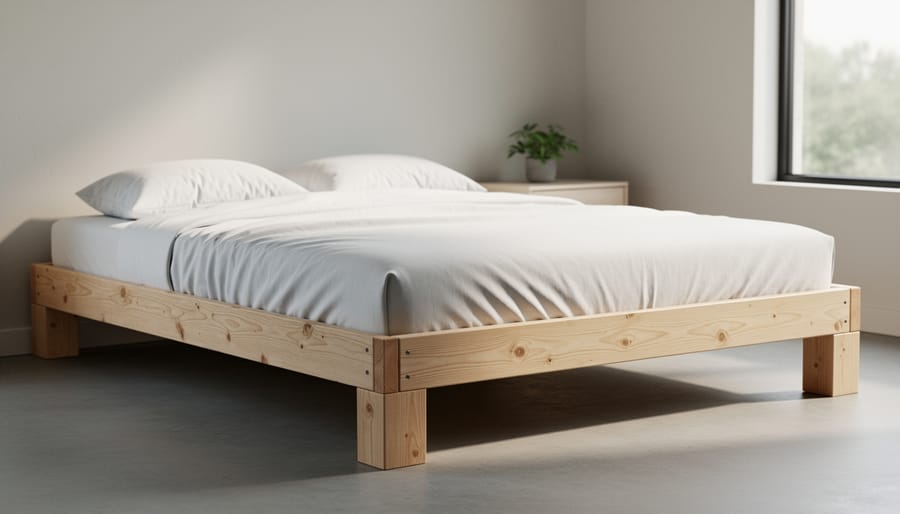
A bed frame built from 2x4s makes an excellent intermediate project that shifts your skills from smaller furniture to a substantial, everyday piece. You’ll need to think carefully about weight distribution, a twin frame carries one person, but a full supports two, plus mattress weight. The key is spacing your support slats no more than three to four inches apart across the width of the frame to prevent sagging and ensure even weight distribution.
Start by building a sturdy perimeter frame using doubled or tripled 2x4s for the long sides, which creates the necessary thickness to handle dynamic loads when people move in their sleep. The headboard and footboard frames connect with lag bolts or heavy-duty corner brackets, not just screws. Your center support beam, running lengthwise down the middle of a full frame, is non-negotiable, it prevents the long rails from bowing over time.
This project teaches you to work with longer boards, maintain square on a large assembly, and understand structural engineering basics that apply to nearly all furniture. Once you’ve built your first bed frame and see it holding weight night after night, you’ll approach bigger builds with genuine confidence. Adding a simple vertical headboard from additional 2x4s is straightforward and lets you personalize the piece with stain or paint that matches your bedroom.
7. Entryway Coat Rack and Bench Combo
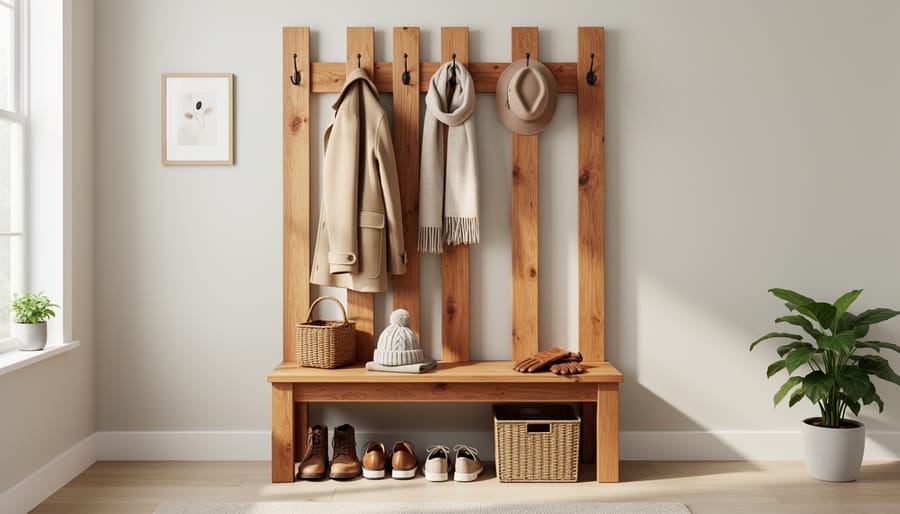
This multifunctional piece solves two mudroom challenges at once: somewhere to sit while removing shoes and a place to hang coats, bags, and hats. The design combines vertical posts with a horizontal bench frame, creating a compact footprint that maximizes utility in tight entryways.
Start by building the bench base with standard 2×4 framing techniques, then extend vertical posts upward from the back to support a top rail for hooks. The key decision is hook placement, space them 6 to 8 inches apart so coats don’t crowd each other, and mount them at heights that work for your household (lower hooks for kids, higher for adults). You can use simple metal coat hooks from any hardware store or get creative with wooden pegs.
The bench seat itself can be slats with small gaps for air circulation, or a solid top made from edge-joined 2x4s. For added function, frame in an open shelf beneath the seat for shoe storage or baskets, just a simple cross-brace 6 inches off the floor with a few slats laid across.
This project teaches you to think in three dimensions, balancing vertical and horizontal elements for both strength and visual appeal. It’s practical problem-solving with wood, and you’ll use the result every single day.
8. Simple Bookshelf
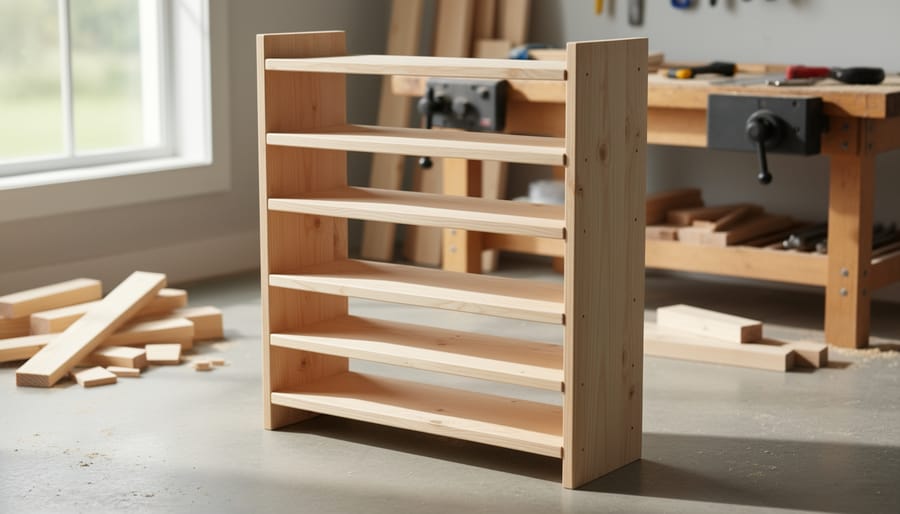
A freestanding bookshelf built from 2x4s makes an excellent practice project because you’ll repeat the same cuts multiple times, building speed and accuracy with each shelf. Start by deciding your shelf count and spacing, 12 to 14 inches between shelves works well for most books, while taller spacing accommodates oversized volumes or decorative items.
The basic construction uses vertical 2x4s as the side supports and horizontal pieces for each shelf. You can notch the shelves into the uprights for a cleaner look, or simply screw them in place for faster assembly. Adding a thin plywood or 1×4 backing dramatically improves stability and prevents racking, especially for taller units. This backing also gives you a surface to mount the bookshelf securely to the wall if needed.
This project rewards efficient building habits, set up a stop block on your saw to ensure all your shelf pieces are identical, and pre-drill all your screw holes before assembly. These time-saving techniques turn what could be tedious work into smooth, satisfying progress. Sand everything before assembly to avoid tight corners later, then finish with stain or paint to match your space.
9. Outdoor Lounge Chair or Adirondack Chair
An Adirondack chair might be the most rewarding 2×4 project you tackle, it’s the comfortable, tilted-back outdoor seating that defines relaxed summer afternoons on decks and patios. This build challenges you to work with angled cuts throughout: the sloped back, reclined seat, and splayed legs all require precise measuring and cutting at angles rather than the straight 90-degree cuts you’ve used in simpler projects. The ergonomic design isn’t accidental, those angles create the signature comfort that makes Adirondacks so appealing, with your body naturally settling into the contoured seat and back support.
You’ll develop real confidence with your miter saw here, cutting bevels and miters that must fit together precisely for proper support and aesthetics. Most plans use a combination of 2x4s for the structural frame and wider boards for the seat slats and back, though some builders use exclusively 2x4s by placing them edge-to-edge. Weatherproofing is essential: apply exterior stain or sealant before assembly if possible, paying special attention to end grain where moisture penetrates most easily. Once you’ve mastered the Adirondack, you can build matching sets for your outdoor space, or explore 4×4 no-saw ideas for complementary outdoor pieces that require different techniques.
10. Kitchen Island or Rolling Cart
A kitchen island or rolling cart built from 2x4s transforms underutilized floor space into valuable workspace and storage. This project works equally well as a permanent installation or a mobile unit that rolls wherever you need it, from prepping vegetables to serving appetizers during gatherings.
Start by building a sturdy rectangular base frame, then add vertical corner posts and a matching top frame. The lower shelf sits perfectly for storing pots, mixing bowls, or small appliances. If you’re building a rolling version, choose heavy-duty locking casters rated for at least 100 pounds per wheel. Mount them securely to the bottom frame with lag screws, not just wood screws, since kitchen islands bear considerable weight.
For the countertop, you’ve got options: a thick piece of plywood (which pairs well with beginner plywood projects you might already know), butcher block for a warm look, or even repurposed barn wood. Sand the entire structure thoroughly and finish with food-safe polyurethane if you’ll be prepping directly on the surface. This build teaches you how to work with hardware beyond basic screws and how moving parts affect structural decisions, skills that apply to countless future projects.
11. Kids’ Toy Storage Bench
A kids’ toy storage bench solves two problems at once: it gives little ones a place to sit while putting on shoes, and it corrals toys into designated bins or cubbies. The low height makes it accessible for children to use independently, teaching them organizational habits early. When building for kids, round over all exposed edges with a router or sandpaper to eliminate sharp corners. Choose a stable, wide stance for the legs to prevent tipping, and make sure all fasteners are recessed or covered so curious hands won’t find them. For added safety, skip any hinged lids that could pinch fingers, open cubbies or removable fabric bins work better.
This project lets you get creative with the finishing. Bright, cheerful colors make the bench inviting, or you can match it to the room’s existing décor. Many parents add chalkboard paint to one side panel so kids can draw, or attach fabric bins that can be tossed in the wash. The straightforward construction teaches you how to build at a smaller scale, which translates well to other furniture projects down the road.
12. Outdoor Picnic Table
An outdoor picnic table is a rewarding centerpiece for any backyard, deck, or patio, and it’s more achievable than you might think. This classic project combines a sturdy tabletop with integrated bench seating, giving you ample space for family meals, summer barbecues, and weekend gatherings. The construction teaches valuable skills in angled leg assembly and managing multiple identical components, making it an excellent intermediate-level build that reinforces what you’ve learned from simpler projects.
The signature element of a picnic table is the A-frame leg design, where each end features angled supports that provide both strength and visual balance. You’ll cut matching angles on each leg piece, typically around 60 degrees, then join them with cross-bracing for stability. Since you’re building two table supports and two bench supports, you’ll quickly develop a rhythm cutting and assembling these repeating components, a great way to improve accuracy and consistency.
The integrated benches attach directly to the leg assemblies, creating a cohesive structure that won’t shift or separate. Most designs use a center support beam running the table’s length, with bench and table planks spanning across. Pre-drilling all screw holes prevents splitting and gives you clean, professional results. Apply exterior-grade sealant or stain to protect your work from the elements, and you’ll have a functional outdoor dining spot that lasts for years. There’s genuine satisfaction in watching friends and family gather around something you built with your own hands.
13. Minimalist Desk
A minimalist desk built from 2x4s delivers clean lines and a functional workspace without the clutter of complicated joinery or excessive materials. Start by determining your desktop dimensions based on your available space and intended use, 48 inches wide by 24 inches deep works well for most home offices, while students might prefer a more compact 36 by 20 inch footprint. The desktop itself can be constructed from 2x4s laid flat and edge-joined, or you can use a single sheet of plywood supported by a 2×4 frame for a smoother writing surface.
Leg placement matters more than you might expect. Position legs about two inches in from each corner to create visual balance while maintaining structural integrity. For legroom comfort, ensure at least 24 inches of clearance between the front legs and consider setting the back legs slightly wider if you plan to tuck your chair fully underneath. Standard desk height sits at 29 to 30 inches, but measure your chair and adjust accordingly before making final cuts.
Cable management transforms a functional desk into a truly practical workspace. Drill a two-inch hole near the back corner of the desktop for routing power cords and charging cables, or attach a simple 2×4 ledge underneath the back edge to corral loose wires. These small details elevate your build from basic to thoughtfully crafted furniture that serves you daily.
14. Garden Trellis or Privacy Screen
A garden trellis or privacy screen transforms 2x4s into functional outdoor architecture that serves your space year-round. This vertical project teaches pattern planning and precision spacing while creating a structure that supports climbing roses, clematis, or jasmine, or simply defines a private corner of your deck or patio.
You can build a classic diamond lattice by cutting 2x4s into thinner strips and crossing them at angles, or keep it simpler with vertical slats spaced evenly for a modern screen. The beauty lies in customizing the pattern to match your garden’s style. For stability, either sink posts into the ground with concrete footings or mount your trellis into a sturdy planter box filled with soil and plants.
Weatherproofing matters here. Apply exterior-grade stain or sealant to all surfaces before assembly, paying special attention to end grain where moisture sneaks in. A second coat after construction adds years of life. As your plants climb and fill the gaps, you’ll watch your woodworking literally grow into the landscape.
This project rewards patience in the planning stage. Sketch your pattern, calculate spacing, and cut a test piece before committing to the full build.
15. Simple Nightstand or Side Table
A simple nightstand built from 2x4s proves that good design doesn’t require complexity. This scaled-down project uses just a handful of boards, typically four legs, a few horizontal supports, and slats for the top, making it achievable in an afternoon while still delivering a polished, custom look beside your bed or next to a couch.
The construction follows the same principles as larger tables, just at a more manageable scale. Cut your legs to nightstand height (usually 24-28 inches to align with mattress level), then connect them with horizontal stretchers near the top and bottom for stability. The top surface can be as simple as three or four 2x4s laid flat and secured to the frame, or you can get creative with a herringbone or diagonal pattern if you’re feeling adventurous.
What makes this project particularly rewarding is the finishing stage. Because it’s a smaller piece with visible surfaces in your living space, you can experiment with stains, paints, or mixed finishes to match your existing furniture. A dark walnut stain creates a sophisticated look, while painted legs with a natural wood top offers modern contrast. Adding an optional lower shelf between the bottom stretchers gives you extra storage for books or a charging station without complicating the build.
Resources and Plans to Get Started
Finding the right plans can make the difference between a frustrating weekend and a successful build. Start with project books that walk you through each step. “Great Outdoor 2×4 Furniture: 21 Easy Projects to Build” offers proven outdoor designs, available pre-owned through major retailers. Another solid option, “2X4 Furniture: Simple Inexpensive and Great-Looking Projects,” currently sells for $16.95 in very good used condition, down from its original $39.95 price point.
Beyond books, free online plan websites provide downloadable blueprints for many of the projects we’ve covered. Look for plans with cut lists, material estimates, and assembly diagrams. Woodworking forums and social media groups offer another valuable layer, where you can see real builders tackle the same projects, troubleshoot problems, and share modifications.
At Vincent Furniture Making Classes, we combine structured instruction with hands-on project work. You’ll learn proper techniques while building actual furniture, not just reading about it. Having an experienced instructor available when you hit a snag speeds your progress and builds confidence faster than working alone.
Whether you choose a book, free plans, or guided instruction, detailed directions eliminate guesswork. You’ll spend less time figuring out what goes where and more time developing real skills with saw and drill in hand.
Essential Tools and Materials for 2×4 Projects
You don’t need a fully equipped workshop to start building 2×4 furniture. A modest collection of essential tools will handle most beginner and intermediate projects, and you can expand your kit as your skills and ambitions grow.
Start with these core tools:
- A saw for cutting lumber to length, circular saw for speed, miter saw for precise angles, or a handsaw if you prefer quiet, portable simplicity
- A cordless drill/driver for drilling pilot holes and driving screws
- Measuring tape (25-foot) and a speed square for accurate layout and cuts
- Bar clamps or pipe clamps to hold pieces steady during assembly
- Sandpaper in assorted grits (80, 120, 220) or a random orbital sander
- Wood screws in various lengths (2.5-inch and 3-inch cover most 2×4 joints)
- Wood glue for stronger joints
- Finish of your choice, exterior stain and sealer for outdoor builds, paint or polyurethane for indoor pieces
Nice-to-have additions include a pocket hole jig for cleaner joinery, a countersink bit to recess screw heads, and sawhorses for a stable work surface. Many projects in this list can be tackled with just the basics and a folding workbench or even a sturdy kitchen table protected with cardboard.
The beauty of learning with 2x4s is that you’re building real furniture while discovering which tools truly suit your workflow. Start small, invest as you go, and remember that craftsmanship comes from practice, not from owning every gadget in the catalog.
Tips for Success with 2×4 Furniture Building
Start with quality lumber selection at the store, sight down each board’s length to check for straightness, and avoid pieces with large knots, splits, or excessive warping. Measure twice and cut once isn’t just a cliché; it’s the single habit that saves the most material and frustration. Pre-drill pilot holes before driving screws, especially near board ends, to prevent splitting the wood. Sand every surface thoroughly before applying any finish, working through progressively finer grits for a smooth result that showcases your craftsmanship.
Work on a stable, level surface whenever possible, and use clamps to hold pieces in position before fastening. Check for square as you assemble each joint, because small errors compound quickly in larger projects. Don’t rush the finishing process; proper staining, sealing, or painting takes time but makes the difference between a project that looks homemade and one that looks handcrafted. If something isn’t working, step back, reassess, and remember that the woodworking community is built on people helping each other solve problems and celebrate successes together.
Common Questions About Building with 2x4s
Are 2x4s strong enough for furniture?
Absolutely. When properly joined and assembled, 2×4 lumber creates sturdy, weight-bearing furniture that’ll last for years. Projects like benches, tables, and bed frames rely on 2×4 construction all the time, and the key is using the right joinery and fasteners for your specific build.
What’s the actual size of a 2×4?
A 2×4 measures 1.5 inches by 3.5 inches after milling and planing, not the nominal 2 inches by 4 inches. This matters when you’re planning dimensions for projects like shelving units or coffee tables, so always measure your actual lumber before cutting.
Do I need a full workshop to build 2×4 furniture?
Not at all. Most projects can be tackled with portable tools: a circular saw or miter saw, a drill with driver bits, measuring tape, a square, and some clamps. You can work in a garage, driveway, or even a patio if the weather cooperates.
How do I weatherproof outdoor furniture?
Apply exterior wood sealers, stains, or paints designed for outdoor use. These products protect against moisture, UV damage, and temperature swings, keeping pieces like planter boxes and picnic tables looking good season after season. Sand the wood smooth first, then apply two to three coats for best results.
What joints work best for beginners?
Start with butt joints secured by screws or pocket hole joinery. Both methods are forgiving, strong enough for functional furniture, and don’t require advanced tools or techniques. As your confidence grows, you can explore more complex joinery like mortise and tenon.
These questions come up in every beginner’s mind when they’re sizing up their first 2×4 project. The good news is that this material is remarkably beginner-friendly. You don’t need years of experience or a garage full of specialized equipment to build something solid and useful.
The learning curve with 2x4s rewards you quickly. Your first bench might take an afternoon, but by the time you’re tackling a nightstand or desk, you’ll move faster and with more confidence. Each project teaches you something new about measuring accurately, cutting straight, and assembling pieces that fit together cleanly.
Building furniture from 2×4 lumber puts real craftsmanship within reach, no matter where you’re starting from. You’ve now got 15 solid project ideas spanning every room and skill level, from a simple outdoor bench you can knock out in an afternoon to a full dining table that’ll become the centerpiece of family gatherings.
The best next step? Pick one project that speaks to you and matches your current comfort level. Grab some straight lumber, gather the basic tools, and start building. You’ll learn more from completing one real project than from reading a dozen articles.
If you want structured guidance and a community of fellow builders cheering you on, Vincent Furniture Making Classes offers hands-on instruction that takes you from tentative first cuts to confident craftsmanship. You’ll find support when you hit a snag and celebration when you nail that perfect joint.
There’s something deeply satisfying about looking at a piece of furniture and knowing you built it with your own hands. That bench by the door, that coffee table where friends gather, that bookshelf holding your favorite reads, they’re not just functional. They’re proof that you can create beautiful, lasting things. So pick up that saw and get started.