
A single sheet of plywood can become a bookshelf, coffee table, storage bench, desk, or outdoor planter box without requiring advanced skills or a workshop full of expensive tools. Most one-sheet projects take just a few hours and cost less than $75 in materials, making them perfect for anyone ready to build real furniture without the intimidation factor.
What makes these projects so achievable is the constraint itself. Working with one 4×8 sheet forces efficient design and keeps cuts manageable. You won’t need a truck to haul materials or a massive workspace to maneuver boards. The best part? You’ll learn fundamental woodworking skills like measuring accurately, making straight cuts, and assembling sturdy joints that translate to more ambitious projects down the road.
Think of this as your entry point into furniture making. If you’ve been browsing catalogs wishing you could build instead of buy, or if you’ve got a space that needs something specific that off-the-shelf options can’t solve, one sheet of plywood is where you start. The material is forgiving, the investment is low, and the satisfaction of sitting on something you built yourself is immediate.
We’re about to walk through five complete projects, each designed to use that full sheet with minimal waste. You’ll get exact cutting diagrams, step-by-step assembly instructions, and the short list of tools you actually need. No guesswork, no complicated joinery you’ve never heard of. Just practical builds that look good and hold up to daily use, designed with beginners in mind but solid enough that experienced woodworkers still find them worthwhile.
Why Start with One Sheet Plywood Projects
Starting with one-sheet plywood projects removes the biggest barriers that stop beginners before they even pick up a saw. A single sheet of quality plywood costs between $50 and $80, depending on grade and location, making your total material investment less than a dinner out. Compare that to buying pre-made furniture or tackling ambitious multi-sheet projects that can easily run into hundreds of dollars before you’ve learned whether woodworking is even for you.
The constraint of working within a single sheet’s dimensions creates natural project boundaries. You’re not staring at an overwhelming pile of lumber wondering where to start. Instead, you’ve got clear limits that guide your design choices and keep the scope manageable. These projects are specifically designed to reach completion in a weekend, which means you’ll see real results before your initial enthusiasm fades.
Material waste drops dramatically when your entire project comes from one sheet. You’ll use nearly every inch, learning to think strategically about cutting layouts and piece placement. This efficiency matters both for your wallet and for developing the planning mindset that separates thoughtful builders from frustrated ones.
There’s something powerful about finishing your first complete piece of furniture. That storage cube or side table sitting in your home isn’t just functional, it’s proof you can do this. The woodworking community recognizes one-sheet projects as legitimate accomplishments, not beginner’s practice. When you share your first build online or in a class, you’ll find experienced makers who remember their own first sheet and are genuinely excited to see yours. Working within constraints doesn’t limit you; it focuses your learning on techniques that matter, building a foundation you’ll use for every future project.
Tools and Materials You’ll Need
You don’t need a fully equipped workshop to tackle these projects. A modest tool collection and some basic materials will get you building real furniture surprisingly quickly.
Essential Tools
- Circular saw (or track saw): cuts your plywood sheet into project pieces; a $60-80 circular saw works perfectly for beginners
- Drill/driver: creates pilot holes and drives screws; a cordless 18V model offers the most versatility
- Clamps: hold pieces together during glue-up and assembly; start with four 24-inch bar clamps
- Combination square: ensures your cuts are square and checks corner accuracy
- Tape measure: marks cutting lines and verifies dimensions; a 25-foot model handles full sheets
- Sandpaper assortment: smooths surfaces and edges; keep 80, 120, and 220 grit on hand
- Straightedge or level: guides your circular saw for straight cuts; an 8-foot aluminum level doubles as both
Nice-to-Have Additions
- Kreg jig or pocket hole system: creates strong hidden joints quickly
- Random orbital sander: speeds up smoothing work considerably
- Sawhorses: support your sheet during cutting and assembly
The beauty of starting with one sheet projects is that you can add specialized tools as your skills grow. Many beginners discover they can complete their first piece with borrowed tools and a weekend rental from the hardware store.
Materials for Your Projects
Each project in this guide uses a standard 4×8 foot sheet of 3/4-inch plywood, the sweet spot thickness for furniture strength without excessive weight. Expect to pay between $50 and $80 depending on your plywood grade. For your first project, birch or maple plywood offers a smooth surface that finishes beautifully without the premium hardwood cost.
You’ll also need wood glue (Titebond or similar), 1-1/4 inch wood screws, and your choice of finish. A quart of polyurethane or water-based poly costs around $15 and covers multiple projects. These simple materials transform your sheet into finished furniture that looks store-bought.
Safety First: Essential Workshop Precautions
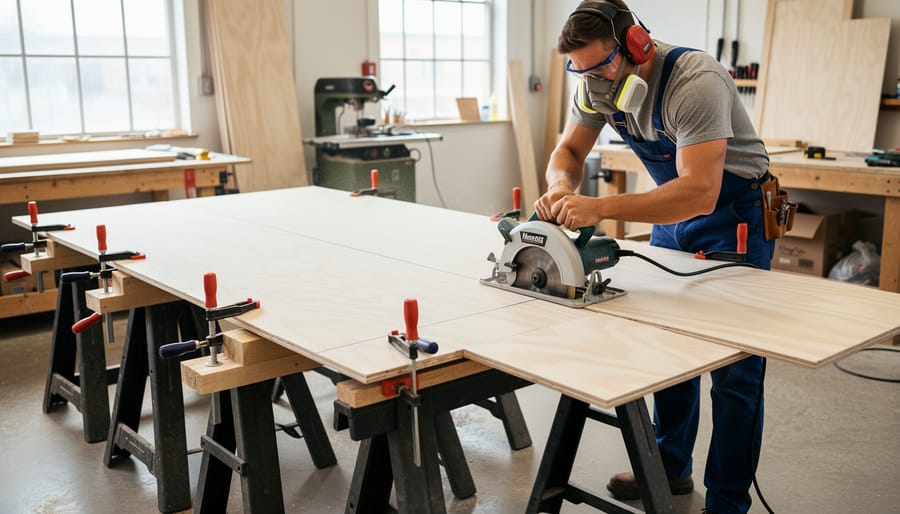
Working with full plywood sheets demands respect and preparation. A 4×8 sheet of 3/4-inch plywood weighs 60-70 pounds, and its size creates unique hazards that don’t exist with smaller lumber.
Start with proper lifting technique. Bend at your knees, keep the sheet vertical against your body, and walk it to your cutting area rather than carrying it flat. If the sheet feels too heavy or unwieldy, get help. There’s nothing amateur about asking for assistance, experienced woodworkers know that solo wrestling with sheet goods is how injuries happen.
Set up sawhorses or a cutting platform that keeps the sheet stable and level. The cutoff piece needs support just as much as the keeper piece does. When making cuts, position yourself so you’re never in the path of potential kickback.
Eye protection isn’t optional. Plywood splinters travel fast and far. Hearing protection matters too, circular saws operate at 100+ decibels, and repeated exposure damages hearing permanently. Wear a dust mask or respirator because plywood dust contains formaldehyde and other irritants that accumulate in your lungs.
Keep your workspace clean. Sawdust on the floor becomes a slip hazard, especially when you’re maneuvering large panels. A shop vacuum or dust collection system makes the work safer and more pleasant.
Safe practices don’t slow you down. They build the calm confidence that lets you focus on precision rather than worry.
Breaking Down Your Plywood Sheet: The Foundation Step
Breaking down a full plywood sheet is intimidating the first time, but mastering this step unlocks every project that follows. A 4×8 foot sheet is unwieldy and dangerous if handled carelessly, so proper technique matters more than speed. Think of this as your foundation skill, get it right once, and you’ll repeat it confidently for years.
- Plan your cuts on paper first. Sketch the sheet as a rectangle and draw where each piece will come from, positioning larger parts to minimize waste. Label each section with dimensions and which project piece it becomes.
- Transfer measurements to the actual sheet using a straightedge and pencil. Mark both the cut line and an X on the waste side so you always know which side falls away. Double-check dimensions against your plan before cutting anything.
- Set up supports that hold the entire sheet level. Two sawhorses work well, or create a cutting station from rigid foam insulation laid on the floor. The key is supporting both sides of every cut so pieces don’t pinch the blade or fall and splinter.
- Make your cuts with a circular saw guided by a clamped straightedge, or use a track saw if available. Cut slowly and let the saw do the work. For cross-grain cuts, score the veneer lightly first to prevent tear-out on the bottom face.
- Label each cut piece immediately with painter’s tape showing its project name and part number. This simple habit prevents confusion when you start assembly and saves time you’d otherwise spend measuring pieces again.
Keep your blade sharp and set to cut just slightly deeper than the plywood thickness. A dull blade causes tear-out and makes the saw harder to control. These time-saving techniques apply whether you’re building one cube or all five projects from this guide, the breakdown process stays consistent.
Stack your labeled pieces in the order you’ll need them for assembly. This organization transforms a pile of plywood into the beginning of actual furniture.
Project 1: Simple Storage Cube
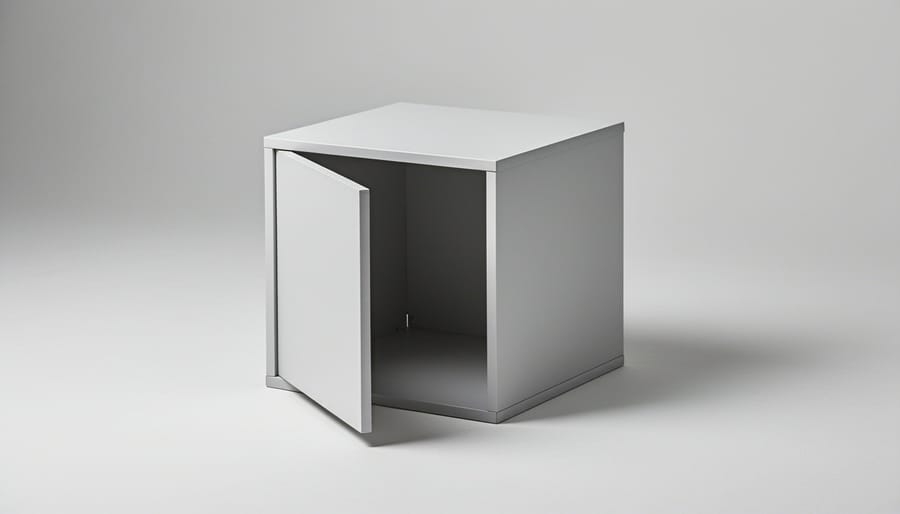
This storage cube is perfect as your first project because it teaches you how to create square corners and join panels, skills you’ll use in every future build. You’ll end up with a versatile piece that works as a side table, plant stand, or open shelving unit.
Step 1: Cut Your Panels
Mark and cut six identical squares measuring 18 inches by 18 inches from your plywood sheet. Double-check each measurement before cutting. Stack the pieces after cutting and verify they’re all the same size, this ensures your cube will assemble square.
Step 2: Sand All Surfaces
Before assembly, sand each panel with 120-grit sandpaper, focusing on the edges where saw blade marks are most visible. This is far easier now than after the cube is assembled. Wipe away dust with a slightly damp cloth.
Step 3: Lay Out Your Assembly
Arrange your six panels to visualize the cube: one bottom, four sides, and one top. Mark which edges will meet so you can apply glue precisely.
Step 4: Join the First Corners
Start by connecting two side panels to the bottom piece. Apply wood glue along the edges, then secure with 1¼-inch screws spaced every 4 inches. Pre-drill holes to prevent splitting. Use a carpenter’s square to verify 90-degree corners before the glue sets, this determines whether your entire cube sits level.
Step 5: Complete the Box
Attach the remaining two sides, checking square at each joint. Add the top panel last. Clamps help hold everything while fasteners grab.
Step 6: Final Touches
Fill screw holes with wood filler if desired. Sand any rough joints with 220-grit paper. Apply your chosen finish.
This project teaches you that furniture is just panels joined carefully at right angles. Get these corners square, and you’ve mastered the foundation.
Project 2: Modern Side Table
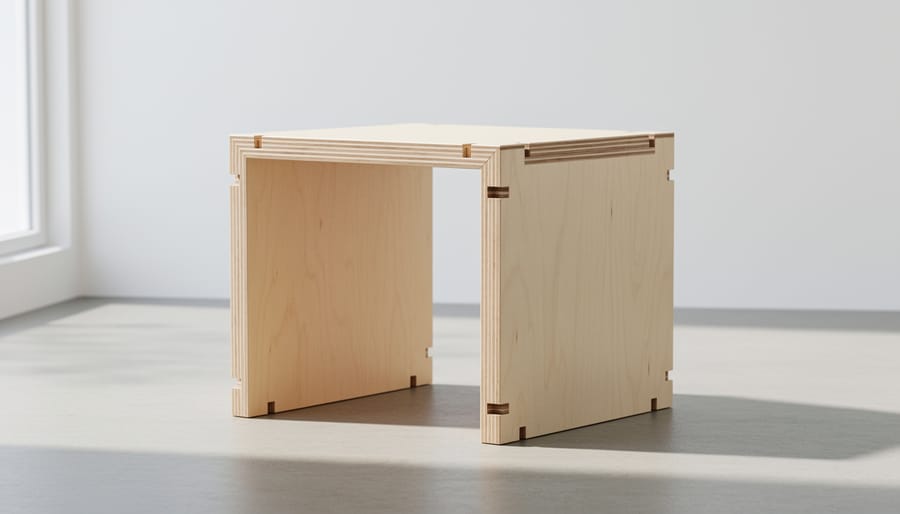
The modern side table steps up your skills with joints that lock pieces together rather than simply butting them against each other. This project uses about one-third of your plywood sheet and results in a sleek table measuring approximately 16 inches square and 24 inches tall.
Start by cutting four pieces: a 16×16-inch top, two 14.5×24-inch side panels, and one 14.5×14.5-inch lower shelf. The sides sit between the top and shelf, creating a strong vertical structure.
Here’s where joinery makes a real difference. Cut a rabbet (an L-shaped groove) along the top inside edge of each side panel, 3/4 inch wide and 3/8 inch deep. The tabletop will sit into these rabbets, creating a flush, professional look while adding mechanical strength. For the shelf, cut dadoes (square grooves) across the inside face of each side panel, 12 inches from the bottom, matching your plywood thickness.
Dry-fit everything first. The shelf should slide snugly into the dadoes, and the top should rest in the rabbets with the side panels flush to its edges. This test run prevents surprises during glue-up.
When you’re ready to assemble, following an efficient workflow matters. Apply glue to the dadoes and insert the shelf into one side panel. Add the second side panel, then clamp the assembly and check that it’s square. Once that sets for 30 minutes, apply glue to the rabbets and attach the top, clamping down firmly.
After the glue cures overnight, sand all surfaces and round over the sharp top edges slightly. The clean geometry of this table really shines with a simple finish like clear polyurethane or matte paint.
Project 3: Entryway Bench
This bench combines seating with practical storage below, and it teaches you how to handle longer cuts while thinking through structural loads. The finished piece measures roughly 48 inches long, 16 inches deep, and 18 inches high, a substantial project that still emerges from your single sheet.
Cut your seat panel first at 48×16 inches, then two side panels at 16×18 inches each. For the bottom shelf, cut a piece at 46.5×14.5 inches, which accounts for the thickness of the side panels and allows it to sit recessed. This is where joinery planning becomes important, you’re creating a piece that must support a person’s weight, not just hold books.
Attach support cleats along the inside of each side panel, 2 inches from the bottom edge, using 1×2 inch strips cut from scrap. These will carry the bottom shelf. Add similar cleats 1 inch below the top edge to support the seat panel, preventing it from sagging over time.
Assembly follows a logical sequence: stand one side panel upright, attach the bottom shelf to its cleats with glue and screws, then attach the second side panel. Once the base is square and stable, position the seat panel on the top cleats. Drill pilot holes through the cleats into the seat from inside the bench to hide all fasteners.
The open storage below works perfectly for shoes or baskets. If you want cushioning, cut a piece of 2-inch foam to match the seat dimensions and cover it with fabric, securing underneath with a staple gun. This bench handles real household use while teaching you to think structurally, every piece supports another, and the whole becomes stronger than its parts.
Project 4: Wall-Mounted Desk
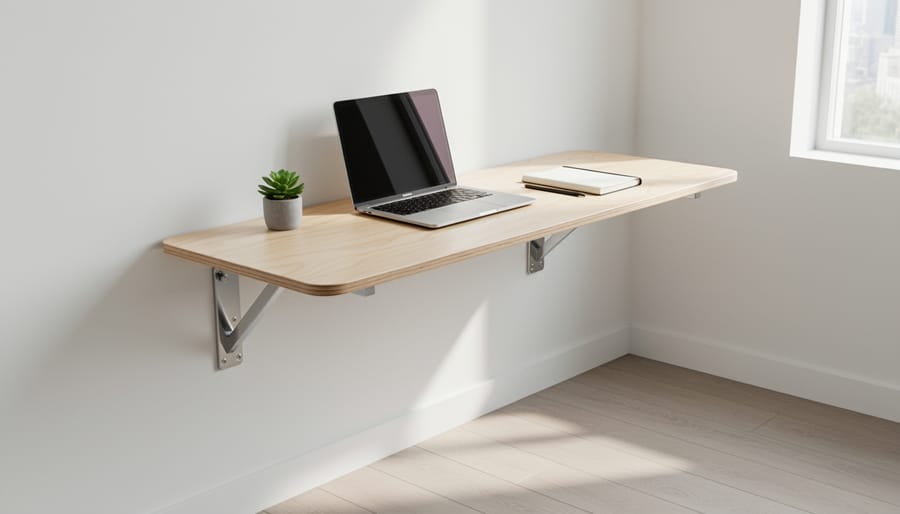
A wall-mounted desk maximizes floor space while providing a dedicated work surface, and this project teaches essential skills for any furniture that hangs on walls. You’ll create a sturdy desk that appears to float, complete with hidden support brackets and thoughtful cable routing.
Start by cutting your desktop to 48 inches wide by 20 inches deep. Cut two support brackets from the remaining plywood, each 18 inches deep by 16 inches tall, with a 45-degree angle cut along the top edge where they’ll meet the underside of the desktop. This angled connection distributes weight effectively while keeping the brackets visually clean.
The critical element is attaching to wall studs, not just drywall. Use a stud finder to locate at least two studs within your desk width, marking their centers clearly. Your support brackets must anchor directly into these studs with 3-inch wood screws (minimum two screws per stud, per bracket).
Position the brackets level at your desired height (standard desk height is 28-30 inches), then secure them firmly to the studs. Apply wood glue to the angled tops of the brackets and set your desktop in place, driving screws up through the brackets into the desktop underside for a solid connection that enables faster assembly.
For cable management, drill a 2-inch hole near the back corner of the desktop before mounting, allowing cords to drop directly to outlets. Consider routing a shallow groove along the back edge with a router to keep cables organized and hidden from view.
Test the installation by applying downward pressure at the front edge, there should be no flex or movement. A properly mounted desk will support a monitor, laptop, and leaning weight without concern.
Project 5: Bookshelf with Adjustable Shelves
Building a bookshelf teaches you precision layout work and introduces the professional touch of adjustable shelving. This project creates a 36-inch-tall unit with five shelf positions.
Cutting Your Pieces
Start by cutting two sides at 36 inches tall by 11 inches deep. Cut the top, bottom, and four shelves to 30 inches wide by 10.5 inches deep. The slightly narrower shelves accommodate the shelf pins while maintaining clean edges.
Creating the Shelf Pin System
The magic of adjustable shelves lies in the pin holes. Create a simple drilling template from scrap: mark holes every 2 inches along a straight edge, starting 3 inches from the bottom. This spacing gives you flexibility without weakening the sides.
Clamp your template to the inside face of each side panel, 2 inches from the front edge. Drill holes 3/8 inch in diameter and 1/2 inch deep. Wrap tape around your drill bit exactly 1/2 inch from the tip as a depth stop, this prevents drilling through the plywood face. Repeat for a second row 2 inches from the back edge. The template ensures both sides match perfectly.
Assembly Sequence
Attach the fixed top and bottom shelves to the side panels using pocket holes or wood glue with finish nails. Check for square before the glue sets. Cut a 1/4-inch plywood back panel to fit the rear opening and attach it with small brads or staples. This back panel prevents racking and keeps the unit square during use.
Finishing Touches
Sand all edges smooth, paying special attention to the shelf fronts where they’ll be most visible. Insert shelf pins in your desired positions and test each shelf level before finishing. This bookshelf holds substantial weight when the back panel is properly attached and the shelves are supported by four pins each.
Finishing Your Projects: From Bare Wood to Beautiful Furniture
Finishing transforms raw plywood into furniture you’ll be proud to display. This stage separates a functional project from a polished piece, and the good news is that the process is straightforward once you understand the sequence.
Start with gap filling. Even careful assembly leaves small imperfections. Use wood filler that matches your intended finish, stainable filler if you’re staining, paintable if you’re painting. Apply it with a putty knife, overfilling slightly, then let it dry completely according to the manufacturer’s instructions.
Now comes the critical finishing sequence:
- Fill any gaps or nail holes with appropriate wood filler and let dry completely
- Sand progressively through 80-grit (if needed for rough spots), 120-grit, then 220-grit, always sanding with the grain
- Raise the grain by wiping the entire piece with a damp cloth, let dry 30 minutes, then sand lightly with 220-grit
- Apply your chosen finish in thin, even coats, following the grain and maintaining a wet edge
- Sand lightly between coats with 320-grit once dry to the touch, typically after 2-4 hours
Edge treatment deserves special attention on plywood. The exposed layers look unfinished, so either apply edge banding (iron-on veneer strips that hide the plies), paint the edges, or use a wood filler specifically designed for plywood edges before sanding smooth.
For finish choice, beginners often succeed with water-based polyurethane for clear coating or chalk paint for color. Both are forgiving, dry quickly, and clean up with water. Apply three coats minimum, letting each dry fully. Clear finishes need 2-4 hours between coats, while paint often requires overnight drying.
The final coat needs a full 24-48 hours to cure before you use the piece. Rushing this step wastes all your earlier effort. Proper finishing protects your work and makes plywood look expensive.
Checking Your Work: How to Know You’ve Succeeded
Before you call any project complete, run through these essential quality checks. They’ll help you spot issues now, while they’re easy to fix, and train your eye for future builds.
Test for Square
Place a carpenter’s square against each corner where two pieces meet. Even a 1/8-inch gap means the corner isn’t true, which compounds into wobbles and uneven edges. If you find an out-of-square joint, loosen nearby screws, adjust, and retighten.
Check Surface Smoothness
Run your hand slowly across all visible surfaces and edges. Your fingers catch imperfections your eyes might miss: rough spots that need more sanding, glue squeeze-out you overlooked, or splinters waiting to happen. A truly smooth surface feels almost glassy.
Verify Joint Strength
Gently apply pressure to each joint without forcing it. Solid connections won’t flex or creak. Any movement means insufficient glue, missing fasteners, or gaps that need filling. These efficiency tips will help you build stronger joints from the start.
Test Stability
Set the piece on a flat surface and press down on opposite corners. Rocking indicates uneven legs or a twisted frame, common with rushed assembly. Small shims can compensate, but understanding why it happened prevents repeat mistakes.
These checks aren’t busywork; they’re how you develop standards that separate decent projects from furniture you’re proud to use.
What to Build Next: Growing Your Skills
Once you’ve completed a few one-sheet projects, you’ll notice something exciting: you’ve built real furniture-making skills without realizing it. Those techniques you practiced, square assembly, joinery, finishing, translate directly to larger, more ambitious pieces.
Your next natural step is combining what you’ve learned across multiple sheets. Take that storage cube design and scale it up into a dresser, or extend the bookshelf concept into a full wall unit. You already know the fundamental processes; you’re just working bigger.
This is also the perfect time to experiment with joinery that goes beyond pocket holes and butt joints. Try creating mortise-and-tenon connections for stronger frames, or explore dovetails for drawer boxes. Each new joint you master opens up different design possibilities and adds serious strength to your work.
Consider upgrading your projects with hardwood edging. A simple strip of oak or maple covering plywood edges transforms the visual quality of your pieces, giving them a custom furniture appearance. It’s a small addition that makes a dramatic difference.
Don’t underestimate the value of learning alongside others. The woodworking community shares knowledge generously through local forums, maker spaces, and dedicated classes. Vincent Furniture Making Classes offers hands-on instruction that builds on these foundational skills, teaching you techniques that books and videos can’t fully capture.
The jump from beginner to intermediate isn’t about complex tools or expensive materials. It’s about taking what works, pushing it slightly further, and learning from people who’ve walked the path before you.
You’ve now got five solid projects in your toolkit, each one designed to take you from a single sheet of plywood to a finished piece of furniture you’ll actually use. The beauty of these builds isn’t just in their simplicity or their cost-effectiveness. It’s that they work. They give you real furniture and real skills without overwhelming you with complexity or draining your budget.
Pick one project that speaks to you. Maybe it’s the storage cube because you need somewhere to stash blankets, or the wall-mounted desk because your workspace needs an upgrade. Don’t wait for the perfect weekend or the ideal conditions. Start measuring, start cutting, and start building.
Remember that the woodworking community thrives on beginners asking questions and sharing their first projects. When you hit a snag or wonder if you’re doing it right, reach out. Forums, classes, and maker spaces exist because people want to help you succeed.
Every woodworker you admire started exactly where you are now, with basic tools and simple projects. The difference between them and someone who never builds anything? They picked up the pencil, marked the first cut, and began.
Your first project is waiting. The plywood is at the store. Go build something.
Common Questions About One Sheet Plywood Projects
Starting with one-sheet plywood projects raises practical questions, especially if you’re new to woodworking. Here are the answers to the most common concerns beginners have when getting started.
What type of plywood should I buy?
For furniture projects, choose 3/4-inch cabinet-grade birch or maple plywood with a B-2 or better face grade. The smooth face makes finishing easier, and the thickness provides structural strength without adding unnecessary weight or cost.
Can I use a hand saw instead of power tools?
Yes, though it requires more effort and time. A quality crosscut hand saw works for these projects, but cutting a full sheet is physically demanding. Many home improvement stores will make initial breakdown cuts for free or a small fee, giving you manageable pieces to work with hand tools.
How much will one project cost?
Expect to spend $75-120 total for your first project: $50-80 for the plywood sheet, $15-25 for screws, glue, and sandpaper, and $10-15 for finish. Your second project costs less since you’ll already have fasteners and finishing supplies.
Do I need a workshop?
Not at all. A garage, basement, or even a driveway works fine for these projects. You need roughly 10×10 feet of space to lay out your sheet and work comfortably, plus access to an electrical outlet for power tools.
How long does each project take?
Plan on 4-8 hours of actual work time spread over a weekend. The storage cube takes about 4 hours, while the bookshelf might need 6-8 hours. This includes cutting, assembly, and the first coat of finish, though drying time adds another day or two.
What if my cuts aren’t perfect?
Small imperfections are normal and fixable. Cuts within 1/16 inch usually work fine since wood filler, sanding, and paint or stain hide minor gaps. The projects in this guide include forgiving joinery methods that accommodate real-world measuring and cutting.
These questions come up in every beginner woodworking class, and they’re worth asking. The honest answer is that your first project will have a learning curve, but that’s exactly the point. You’ll make small mistakes, figure out how to correct them, and finish with both a usable piece of furniture and the knowledge to make the next one better.
The supportive woodworking community understands this progression. Nobody expects perfection from a first project. What matters is starting with a plan, working safely, and seeing it through to completion. Each project teaches you something new about how wood behaves, how joints go together, and how your tools work.
If you get stuck on a specific challenge, local woodworking groups and online forums are full of people who’ve faced the same issue and found solutions. That willingness to help newcomers is one of the best parts of the craft.