
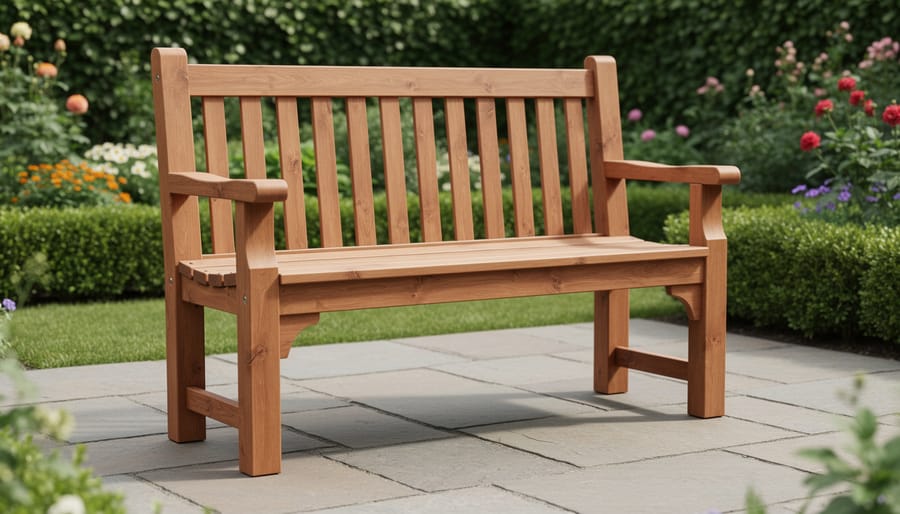
You can build solid, professional-looking furniture with 4×4 lumber using nothing more than a drill, sandpaper, and wood glue. This approach works because 4x4s arrive at the hardware store already cut to standard lengths, eliminating the need for saws while providing the structural strength that thinner boards can’t match. A simple garden bench, for example, takes about two hours to assemble and requires just five pieces of lumber, a handful of screws, and basic assembly skills you probably already have.
If you’ve walked past the lumber aisle thinking furniture making requires a full workshop, you’re not alone. Most beginners assume they need expensive table saws, miter saws, and years of practice before building anything useful. The truth is more encouraging. The same 4×4 posts used for deck construction make excellent building blocks for benches, plant stands, side tables, and outdoor seating. Because they’re thick and sturdy, they forgive small mistakes that would weaken a project built from thinner stock.
The real advantage of no-saw precut projects is how quickly you move from idea to finished piece. There’s no measuring twice and cutting once, no sawdust cleanup, and no anxiety about wasting expensive materials on a bad cut. You’re working with lumber that’s already square, straight, and ready to join together. This guide walks you through your first complete project, then shows you how to adapt the same techniques for other builds.
Why 4×4 Lumber Is Perfect for Beginners
Working with 4×4 lumber gives you a real advantage when you’re just starting out. These thick, substantial pieces transform beginner projects into furniture that feels genuinely solid and professionally made, even when your technique is still developing.
The benefits stack up quickly:
- Structural strength that forgives beginner mistakes and creates stable furniture without complex joinery
- Wide availability in precut lengths at home centers, lumberyards, and big-box stores
- Forgiving assembly process where slight misalignments don’t compromise the finished piece
- Minimal tool requirements, with most projects needing just a drill and basic hand tools
- Professional appearance that makes your first projects look intentional and well-crafted
That heft matters more than you might think. A wobbly 2×4 frame can shake your confidence, but 4x4s stay put. The weight and mass mean your bench or table won’t tip when someone sits down, and joints stay tight even if your measurements are off by a quarter inch. You’re building real furniture, not flimsy attempts.
Here’s the part that removes the biggest barrier: most lumber retailers will cut pieces to your exact specifications, often for free or just a couple dollars per cut. You hand them a list, they make the cuts on their panel saw, and you walk out with project-ready lumber. No need to own, store, or learn a circular saw before you can start building. If you’re looking for more projects that use this same approach, our starter no-saw guide walks through additional beginner builds.
That substantial 3.5-inch-by-3.5-inch profile also means your finished pieces look intentional and chunky in a good way, like you chose this design aesthetic rather than working within beginner constraints.
Tools and Materials You’ll Need
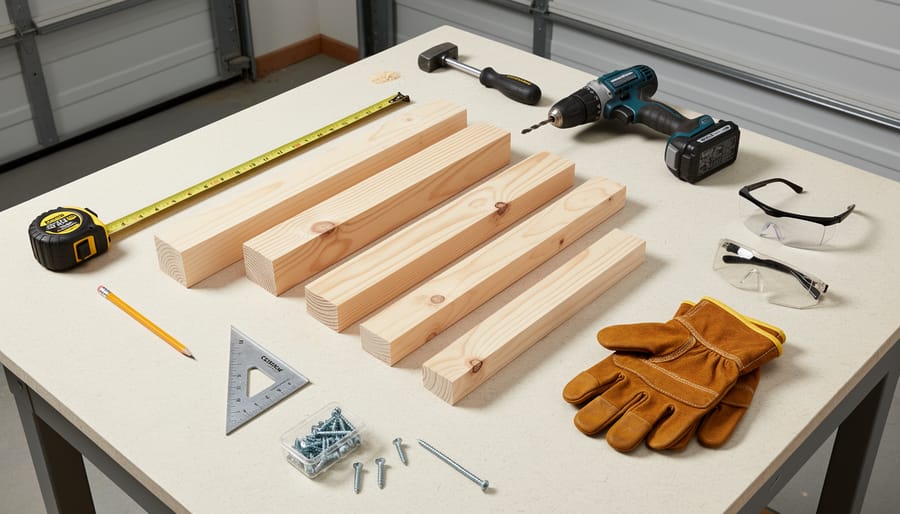
You don’t need a garage full of expensive equipment to start building with 4x4s. Most of these projects require just a handful of basic tools, and chances are you already own several of them.
Essential Tools
A cordless drill/driver is your most important investment. You’ll use it to drive screws and drill pilot holes. Any 12V or 18V model from a reputable brand will work perfectly for 4×4 projects.
Keep a 25-foot measuring tape handy for marking cut requests at the lumber yard and checking your assembly. A carpenter’s square helps you mark straight lines and verify that corners meet at right angles.
A pencil (carpenter’s pencils are great but any pencil works), 120-grit sandpaper or a simple orbital sander for smoothing rough edges, and a basic torpedo level for checking that surfaces sit flat round out your essential toolkit.
Optional But Helpful Items
Bar clamps or corner clamps make holding pieces together during assembly much easier, though you can manage without them by having a helper or using creative positioning. Metal corner brackets add extra strength to joints and can compensate for slight alignment issues. Wood filler lets you hide screw holes or fill small gaps for a cleaner finished look.
Materials for Your Project
Your precut 4×4 lumber comes first. Home centers stock pine, cedar, and pressure-treated options. Pine works well for indoor furniture, cedar resists weather naturally for outdoor pieces, and pressure-treated lumber handles ground contact.
For fasteners, use 3-inch exterior-grade screws for most connections. These provide enough thread to grab both pieces securely without poking through. Exterior-grade wood glue strengthens every joint and takes only seconds to apply.
Finally, choose a finish that matches your project’s location. Outdoor projects need exterior polyurethane, tung oil, or exterior stain. Indoor pieces look great with Danish oil, water-based polyurethane, or simply paint in your preferred color.
Safety First: Working Safely with Lumber and Basic Tools

Working with 4×4 lumber doesn’t require specialized safety equipment, but a few simple precautions will keep your first project enjoyable instead of stressful. Think of these practices as building good habits that’ll serve you through every future woodworking adventure.
Start with the basics of moving lumber. A typical 8-foot 4×4 weighs around 25 pounds, which doesn’t sound heavy until you’re carrying several pieces from your car to your work area. Bend at your knees, keep the lumber close to your body, and don’t try to carry more than one piece at a time if you’re working alone. If a board feels awkward or off-balance, set it down and reposition your grip.
When you’re ready to drill, safety glasses aren’t optional. Wood chips fly up at surprising angles, and a single splinter in your eye can turn your fun Saturday project into an emergency room visit. Keep a pair with your tools so they’re always within reach.
Secure your workpieces before drilling or driving screws. A 4×4 that shifts mid-drill can cause the bit to bind or your hand to slip. Use clamps, have a helper hold the piece steady, or brace it against a solid surface. This simple step prevents most drilling accidents and gives you cleaner, more accurate holes.
Pay attention to how hard you’re driving screws. Overtightening creates invisible cracks inside the wood that can split open days or weeks later. When the screw head sits flush with the surface and the joint feels snug, stop there. You’re aiming for secure, not bulletproof.
Finally, keep your work area tidy. Lumber offcuts, tools, and extension cords become trip hazards fast, especially when you’re focused on your project and walking backward to check alignment. A quick sweep between assembly steps takes thirty seconds and prevents twisted ankles.
Planning Your 4×4 Project: Measurements and Precut Lengths
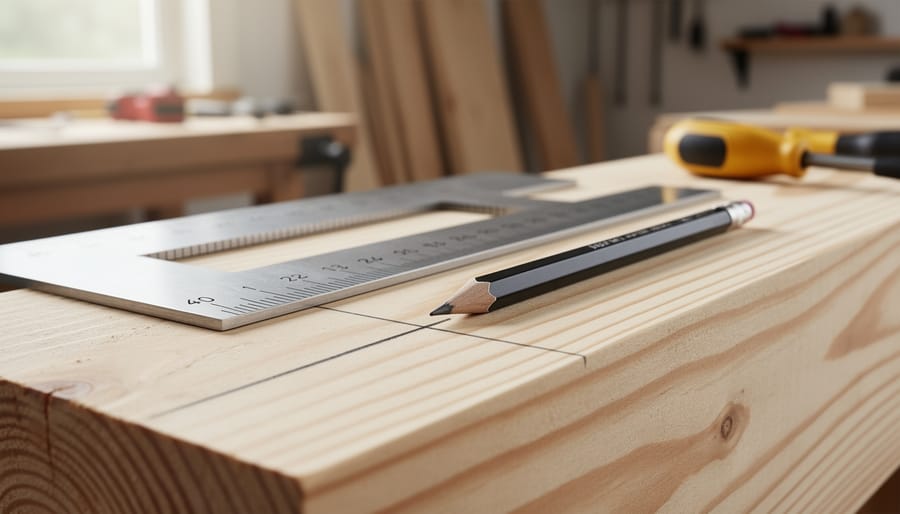
Start with the end in mind: knowing what your finished piece should look like makes the planning process straightforward. Most home centers stock 4×4 lumber in 6-foot, 8-foot, 10-foot, and 12-foot lengths, and planning around these standard sizes is one of the best time-saving techniques you can use. When you design projects to work with these dimensions, you minimize waste and eliminate the need for cutting.
Grab a piece of paper and sketch your project from the side and top views. It doesn’t need to be artistic, just clear enough that you can see how pieces connect. Write dimensions next to each line, then make a list of every piece you’ll need. For a simple bench, that might be four legs at 18 inches, two long rails at 48 inches, and three seat boards at 48 inches.
Now comes the practical part: matching your needs to what’s available. If you need 18-inch legs, a single 6-foot board gives you four pieces (72 inches divided by 18 equals four legs exactly). For 48-inch pieces, you’ll get one from each 6-foot board with a 24-inch remainder, or exactly two from each 10-foot board. This math determines how many boards to buy.
Here’s a simple planning approach that works every time:
- Sketch your project with all dimensions marked clearly
- List every piece you need with its exact length
- Check which standard lumber lengths best match your needs
- Create a cut list showing how many pieces come from each board
- Verify your quantities account for all parts
- Request specific cuts at the lumber yard if needed
When you arrive at the home center, bring your cut list and ask at the lumber desk about cutting services. Many stores offer a few free cuts per visit, and additional cuts typically cost less than a dollar each. Double-check your measurements one last time before they cut, because you can’t add wood back once it’s removed.
Step-by-Step: Building a Simple 4×4 Garden Bench
Preparing Your Lumber
Start by laying out all your 4x4s in your work area so you can see what you’re working with. Check each piece for obvious defects: large knots that might weaken the wood, deep cracks, or chunks of missing wood. A few small knots are fine and add character, but avoid pieces where knots take up more than a third of the width.
Next, check for warping by placing one end on the ground and looking down the length of the board like you’re sighting down a rifle. A slight bow is normal and won’t affect most projects, but if the board twists or curves dramatically, set it aside for a different use. Roll each 4×4 to identify which faces look best, these should face outward on your finished project.
Run your hand along all surfaces to find rough spots, splinters, or mill marks. Hit these areas with 80-grit sandpaper wrapped around a block, working in the direction of the wood grain. You don’t need a perfect finish yet since you’ll sand again after assembly, but removing major roughness now prevents splinters and makes marking easier.
Finally, arrange your pieces in the order you’ll assemble them. Label the ends with pencil if your project uses multiple 4x4s, noting “front left leg” or “top support” to avoid confusion during construction.
Marking and Drilling Connection Points
Start by measuring from the end of your 4×4 where you need the connection point. Mark it clearly with a pencil, making a small X or dot that’s easy to see. Double-check this measurement before moving forward.
Use your carpenter’s square to draw a straight line across the face of the lumber where you’ll drill. This keeps your holes aligned properly instead of wandering at odd angles. Place the square firmly against the edge and run your pencil along it. If you’re connecting two pieces at a right angle, mark both pieces while they’re positioned together so the holes match up perfectly.
For pilot holes, choose a drill bit slightly narrower than your screw’s shaft, not including the threads. A 1/8-inch bit works well for most 3-inch deck screws in 4x4s. This smaller hole guides the screw and prevents the wood from splitting under pressure.
Drill straight down into your mark, keeping the drill perpendicular to the wood surface. Go slowly and let the bit do the work. For connections where screws go through one piece and into another, drill all the way through the first piece, then drill about two inches into the second piece.
Countersinking creates a shallow bowl shape at the hole’s top so the screw head sits flush with or slightly below the surface. Use a countersink bit or simply drill with a larger bit for just the top quarter-inch. This gives your project a clean, professional look and prevents screw heads from catching on clothing or scratching floors.
Assembling Your Bench
Start by applying a thin, even bead of wood glue along the edges where your pieces will meet. You don’t need to flood the joint, too much glue creates messy squeeze-out and doesn’t add strength. Spread it with your finger or a small brush if you want precision.
Position your first pieces together and hold them in place. If you have clamps, now’s the time to use them. No clamps? Stack some heavy objects nearby to lean against the assembly, or ask a helper to hold things steady while you work.
Before driving any screws, step back and eyeball the alignment. Are the pieces flush where they should be? Use your square to check that corners form true 90-degree angles. Making adjustments now takes seconds; fixing them later wastes time.
Drive your screws slowly and steadily through the pilot holes you drilled earlier. Keep the drill perpendicular to the surface, angling causes the screw to push pieces out of alignment. Stop when the screw head sits just below the surface. Overtightening can strip the hole or crack the wood, especially near edges.
After each connection, recheck for square and make small adjustments if needed before the glue sets.
Finishing Touches
Once your bench is assembled, give all surfaces a final pass with 120-grit sandpaper to smooth any rough edges and create an even texture. Pay special attention to corners and edges where hands will touch. Wipe away dust with a damp cloth before finishing.
For outdoor pieces, penetrating oil finishes like tung oil or exterior wood stain protect against moisture while letting the wood grain show. Apply with a brush or rag, following the grain, and let dry completely between coats. Indoor projects look great with simple wax finishes or paint.
Add rubber feet to the bottom of legs to prevent floor scratching and improve stability on uneven surfaces. Corner brackets underneath add extra strength without being visible. These small touches make your project look professional and extend its lifespan considerably.
More 4×4 Project Ideas for No-Saw Builders
Once you’ve built your first bench and seen how straightforward 4×4 construction really is, you’re ready to tackle other projects that rely on the same core techniques. Each of these builds uses precut lumber, basic assembly methods, and the efficient measuring and drilling skills you’ve already practiced.
- Outdoor Side Table: Stack two 4x4s flat to create a sturdy 7×7-inch top, supported by four vertical 4×4 legs at the corners. The chunky proportions look intentional and modern. Needs approximately six 4x4s depending on height.
- Plant Stand: Build a simple three-tier display by creating square frames from 4x4s and stacking them with spacers in between. The open design suits heavy potted plants. Requires about eight to ten 4x4s.
- Simple Bookshelf: Use 4x4s as vertical supports on each end, with horizontal 4x4s laid flat as shelves spanning between them. The thick shelves handle serious weight without sagging. Plan on ten to twelve 4x4s for a three-shelf unit.
- Platform Bed Frame: Create a low-profile frame by arranging 4x4s in a rectangular perimeter with additional supports running across the middle to hold a mattress. The substantial wood gives excellent support. Typically uses twelve to sixteen 4x4s depending on mattress size.
- Entry Bench with Shoe Storage: Build a taller bench with an open space underneath for shoes. The raised design provides comfortable seating height while the gap below keeps footwear organized. Requires approximately eight 4x4s.
All of these projects share the same beginner-friendly qualities: they use glue and screws for joinery, they don’t require precise angles or complex cuts, and the inherent strength of 4×4 lumber means minor imperfections won’t compromise stability. Start with whichever project solves a real need in your home, because you’ll stay motivated when you’re building something genuinely useful.
Checking Your Work: How to Know Your Project Is Solid and Safe
After you’ve assembled your 4×4 project, it’s tempting to step back and call it done, but spending five minutes checking your work can prevent a frustrating repair later. These simple verification steps will give you confidence that your piece is safe to use and built to last.
Start with the wobble test. Place your project on a level surface and gently press down on each corner or edge. A well-built piece shouldn’t rock or shift. If you notice movement, crouch down to eye level and look underneath to see which leg or support isn’t making contact with the ground. Sometimes the floor itself is uneven, but if one leg is consistently shorter, you can add a felt pad or trim a tiny amount off the other legs for stability.
Next, check every screw connection. Run your hand along each joint and gently try to wiggle the pieces where they meet. You shouldn’t feel any play or movement. If a joint feels loose, tighten the screws another quarter turn, but be careful not to overdrive them into the wood. Look for any screws that aren’t sitting flush with the surface, as these can snag clothing or skin.
Inspect the joints themselves for gaps. Small gaps under a quarter inch are usually fine for outdoor furniture, but anything larger suggests the pieces weren’t properly aligned during assembly. You can fill minor gaps with wood filler, let it dry, and sand smooth. For larger gaps that affect structural integrity, you may need to disassemble that joint, recheck your measurements, and reassemble.
Finally, use a level to check horizontal surfaces like bench seats or tabletops. Place the level in multiple positions across the surface. A slight deviation is acceptable for outdoor projects that will sit on uneven ground, but indoor furniture should be close to perfectly level. If you find the surface tilted, check whether the legs are even and that the top is properly secured.
Troubleshooting Common 4×4 Assembly Challenges
Even straightforward 4×4 projects come with learning moments. Here’s how to handle the most common assembly hiccups so you can fix issues quickly and avoid them in future builds.
Splitting happens when screws create too much pressure. If you see cracks forming as you drive screws, stop immediately. The fix: drill larger pilot holes (about two-thirds the diameter of your screw shaft) and position screws at least two inches from any edge. For splits that already happened, apply wood glue into the crack, clamp it closed for an hour, then re-drill a proper pilot hole slightly offset from the original. Prevention beats repair: always pre-drill, especially near board ends where wood fibers are most vulnerable.
Misaligned pieces usually trace back to measurement or clamping issues. If components won’t line up during assembly, loosen all screws slightly, use clamps to hold everything in proper position, then retighten screws one at a time while checking alignment with your square. A helper makes this much easier. For persistent alignment problems, verify your lumber isn’t warped, sight down the length of each 4×4 before assembly and set aside any twisted boards.
Gaps at joints look unprofessional but are easily fixed. Small gaps (under 1/8 inch) can be filled with wood filler that matches your finish, sanded smooth once dry. Larger gaps mean your pieces weren’t held tightly during assembly. Disassemble that joint, apply fresh wood glue, use clamps to close the gap completely, then re-drive your screws. The glue creates a stronger bond than screws alone.
Wobbly projects indicate your assembly isn’t square or a leg isn’t making full contact with the ground. Place your project on a flat surface and identify which leg isn’t touching. You can shim the short leg with thin material, or better yet, check if your frame is twisted, use a level and your square to verify all corners are 90 degrees. Sometimes loosening screws, racking the frame into square, and retightening solves wobble completely.
Screws that won’t drive fully suggest your pilot holes are too small or you’re using hardwood. For dense lumber, drill pilot holes to three-quarters the screw diameter and apply a bit of bar soap or wax to screw threads as lubricant. If you’re stripping screw heads, your drill is set too fast, slow down and apply steady pressure. Switch to a manual screwdriver for the last few turns if needed.
Why did my wood split even though I pre-drilled?
Your pilot hole was likely too small or too close to the board’s edge. Drill holes at least two inches from edges and make them two-thirds the diameter of your screw shaft.
How do I fix a wobbly leg after assembly?
Check if your frame is square using a carpenter’s square at all corners, then verify each leg touches the floor on a flat surface. Loosen screws, adjust the frame into square position, and retighten, this often eliminates wobble without needing shims.
Can I fix a gap in a joint without taking everything apart?
Small gaps under 1/8 inch can be filled with stainable wood filler, but larger gaps require disassembly, fresh glue application, and proper clamping to create a tight joint.
What if my screws won’t go in all the way?
Drill a slightly larger pilot hole and apply bar soap to the screw threads as lubricant. Reduce your drill speed and apply steady, even pressure rather than forcing it.
These challenges are normal parts of learning to build furniture. Each one teaches you something valuable about working with wood. As you gain experience with 4×4 projects, you’ll naturally prevent most issues before they occur. If you’re ready to expand your skills with different materials, beginner plywood projects offer another accessible path that complements what you’ve learned here. The key is staying patient with yourself, every furniture maker has dealt with split wood and wobbly legs at some point.
Next Steps: Growing Your Skills Beyond the Basics
Finishing your first 4×4 project is a genuine accomplishment, and you’ve already learned more than you might realize. The measuring, drilling, assembly and finishing techniques you practiced here translate directly to hundreds of other furniture builds. You’re not a complete beginner anymore.
The natural next step is trying projects that combine different lumber dimensions. A coffee table might use 4×4 legs with a 2×6 frame and 1×6 deck boards for the top. You’ll apply the same drilling and screwing techniques you’ve mastered, just with varied materials. Many retailers stock 2x4s, 2x6s, and 1x lumber in the same precut lengths as 4x4s, so you can still avoid sawing while expanding your design possibilities.
Consider adding simple decorative elements to your next build. Routing rounded edges on table tops, incorporating metal corner brackets as visible design features, or mixing stain colors between components can elevate a basic project into something distinctive. These additions don’t require advanced skills, just a willingness to experiment.
When you’re ready to expand your tool collection, a circular saw or miter saw opens up complete design freedom, but there’s no rush. Many experienced furniture makers at Vincent started exactly where you are now, building confidence with precut lumber before gradually acquiring tools. Our hands-on classes welcome learners at every stage, offering guidance tailored to where you are in your journey. The community aspect matters as much as the instruction, you’ll learn alongside others who share your interest in creating functional, beautiful pieces with their own hands.
You’ve just proven something important: furniture making isn’t reserved for people with workshops full of expensive tools. With precut 4×4 lumber, basic hand tools, and the willingness to try, you can create solid, functional pieces that’ll serve you for years. That garden bench you built? It’s the same foundational approach professionals use, just scaled to match where you are right now.
Every furniture maker you admire started exactly where you are, with a simple project and uncertain hands. The difference between them and beginners who never progress isn’t talent or natural ability. It’s taking that first step, completing something tangible, and building confidence one project at a time. You’ve already done the hardest part by finishing your first build.
The techniques you practiced here, measuring accurately, drilling pilot holes, checking for square, thinking through assembly order, transfer directly to more complex projects. Whether you stick with 4x4s or branch into different dimensions and joinery methods, you’re working with the same fundamental principles. You’re already a furniture maker.
We’d love to see what you’ve created. Share your projects with the Vincent community, ask questions when you hit roadblocks, and keep your hands busy. The best way to improve is simply to build the next thing. Your workshop is wherever you have space to work, and your education continues with every piece you complete.